Module 1.5 (Git/Offer)
 Photo by Yancy Min on Unsplash
Offer creation & Git basics
If a customer wants a cost estimate from you about your services/products it needs an offer. How to make one I learned in this module. Additionally I got in touch with basic Git commands to simplify working with other peoples at the same project/code.
Offer creation
For the first part I learned some general knowledge on how to create an offer for a customer an on what you have to keep an eye on. Normally an offer contains this type of things:
- Provider
- Date
- Location
- Servies/Materials
- Customer
- Contact person
- Reference numbers for the listed items
- Offer number
Afterwards I became a task from my coaches: They wanted me to make them an offer for HTPC (Home Theater Personal Computer) system which was mainly for audio/video usage. After some reasearch I saw on which points I have to watch out for.
In the case of a HTPC there are problems with the cooling because they normally built quiet small (to doesn’t take too much space away) and in my case of where the audio quality had to be good it shouldn’t has to much vents (disturbing the audio quality with it’s noice).
In my first offer I made a more expensive one which had also a lot of server heavy components for really high quality. To make a cheaper one (for more casual users) I also made a second one which still had high-end components included.
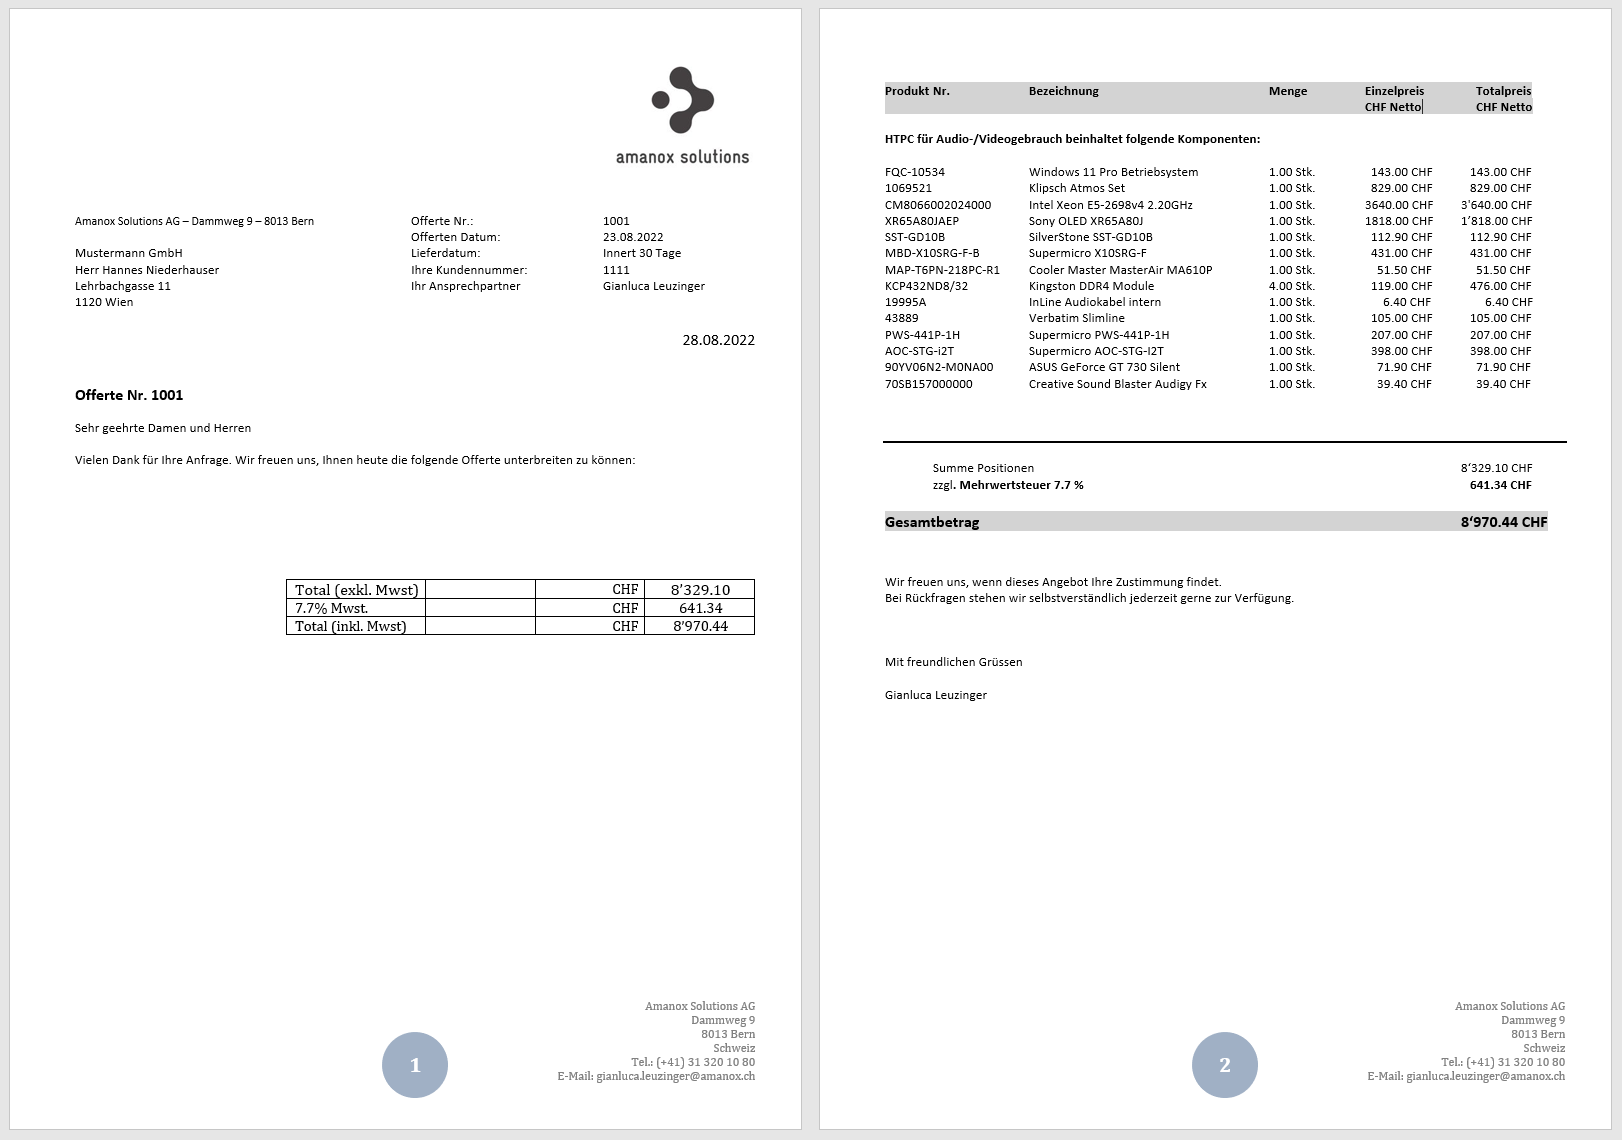
Example of my offer Nr.1
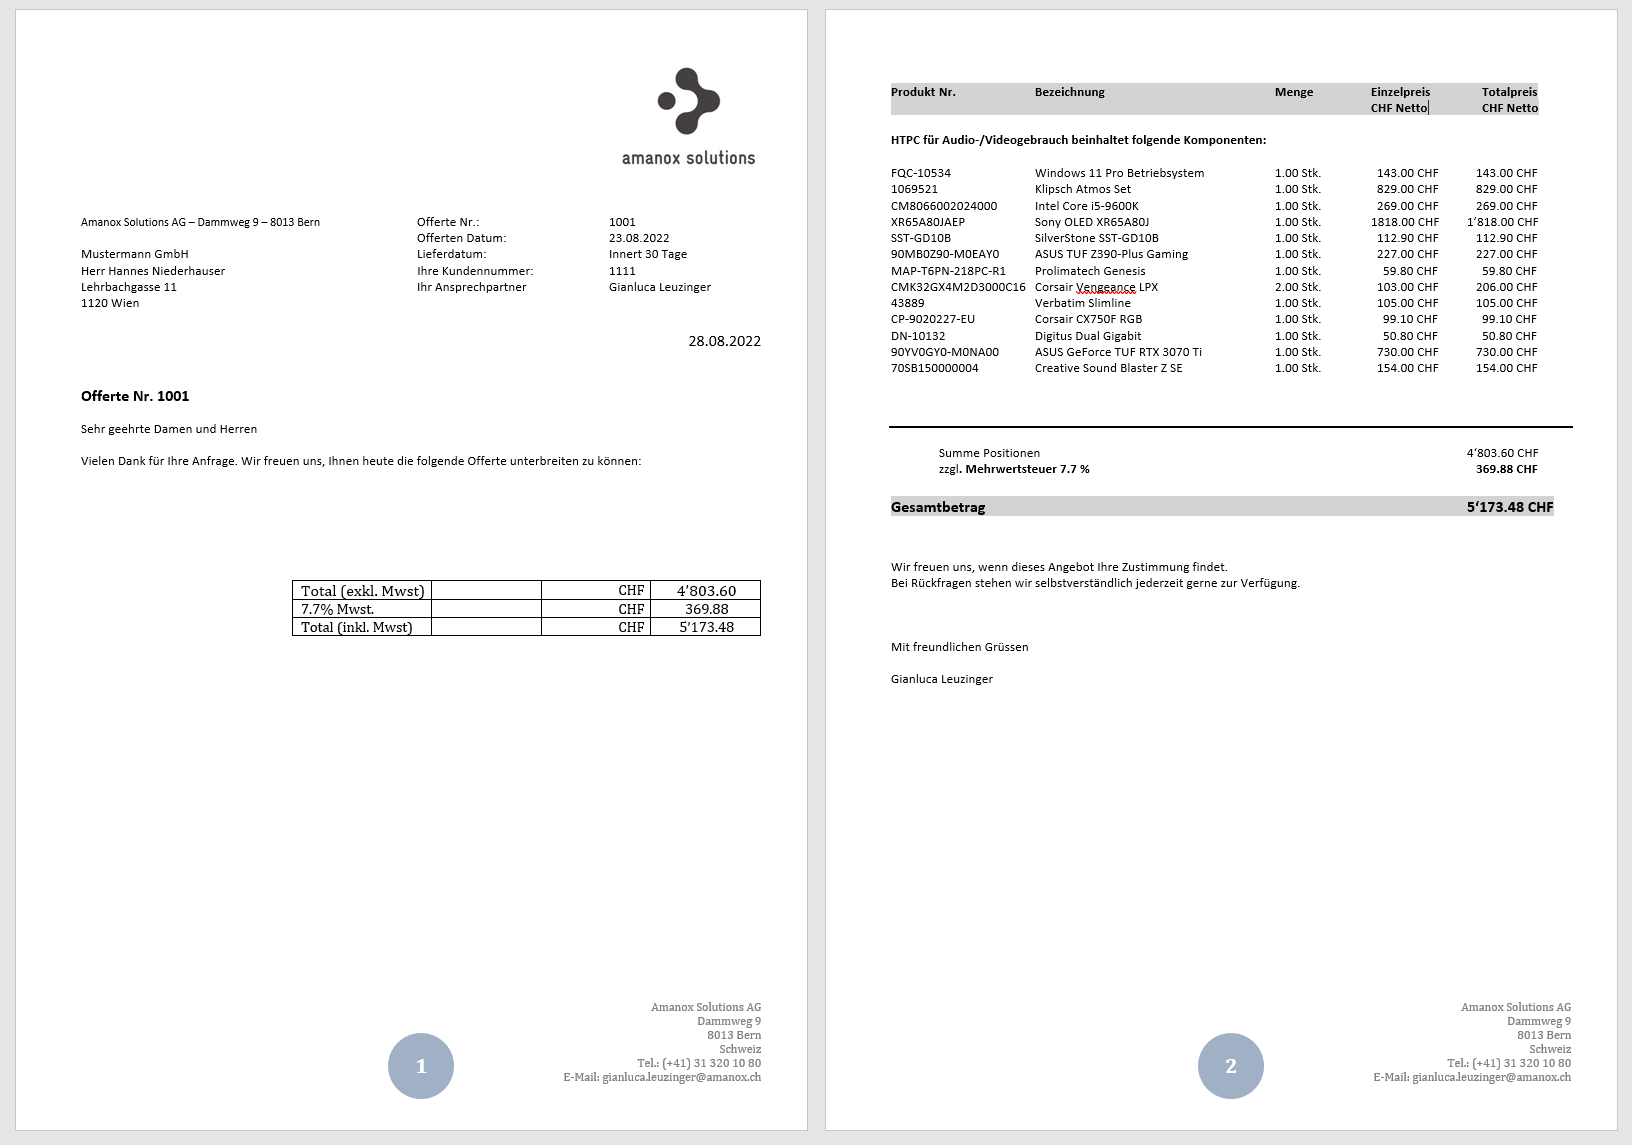
Example of my offer Nr.2
Git basics
Git is a VCS (Sofware versioning tool) to enable multiple programmers working on the same project at the same time. The main concept is based on something called “branching”.
This makes it possible to work on the same software without changing application parts at the live-software. After changing the software on an subbranch the programmer can merge it with the masterbranch to update the live-software. To get an idea of how this approximately works here’s a graphical illustration:
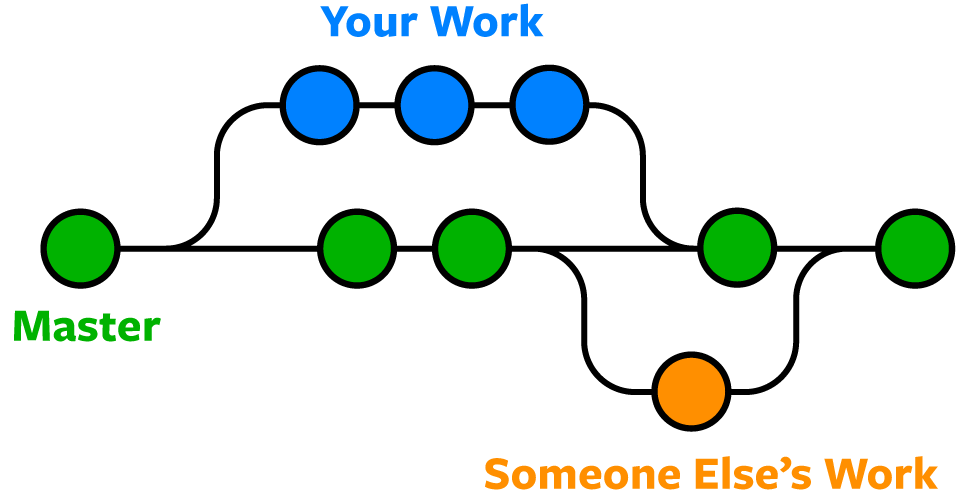
Git branching system / Source: Fabacademy
To use git there are some basic commands which can be used accordingly (Cheatsheet):
- git init + dir (Creates empty repository)
- git clone + repo (Clone a remote repository to the local PC)
- git commit “Commentary” (Saves the changes)
- git push (Pushes the changes to the remote version)
- git branch + branchname (Creates a new branch)
- git checkout + branchname (Switches to another branch)
- git merge + branchname (Merges two branches)
- git pull (Similar to the merge command)
After that short introduction into the Git commands my task was to create a new repository (short “repo”). In it the exercise was to create a new branch and in the branch a new file to see the changes after the push command to the remote version. All in all it worked and I saw my changes on GitHub.
In my second task I had to invite Xavier to my project and define some premissions so an extern (in this case Xavier) can’t make changes on the master branch. Also a so called “pull request” had to be created which funtions as a request to the admin of the project (at this point it was me) which has to decide whether or not the modifications are accepted. Luckily everything worked out fine.
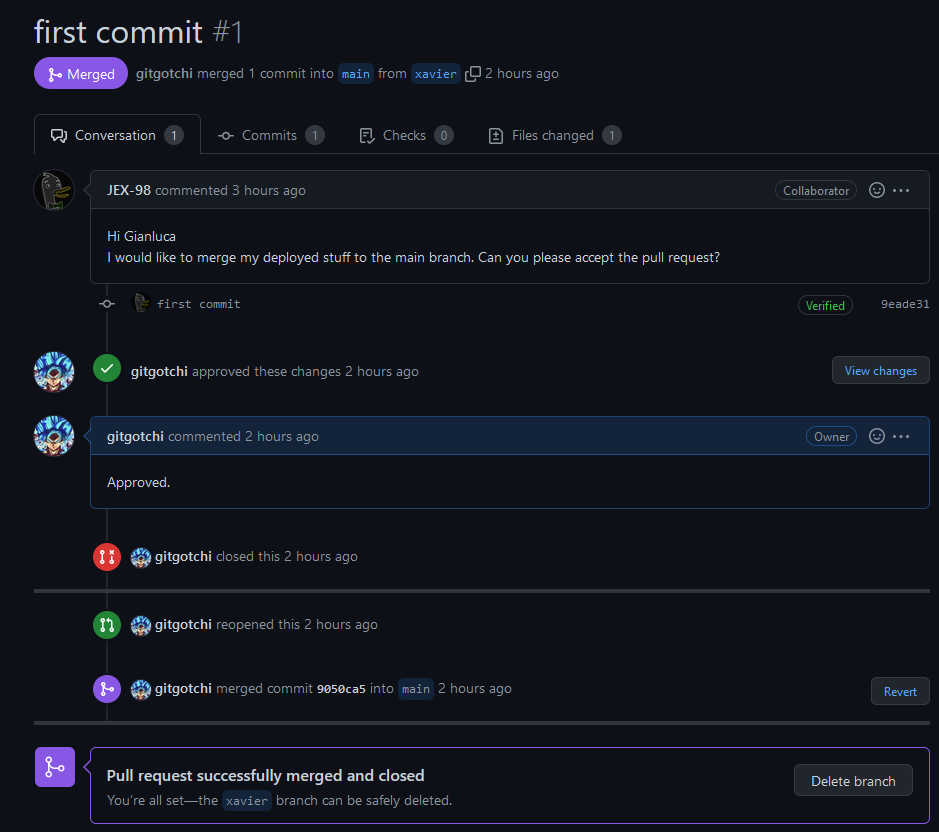
Detail from GitHub
But there can occure some problems. A popular one is a so called “merge conflict”. This happens mostly if two programmers work on the same program in the same branch.

Merge conflict after code editing at the same file / Source: backlog.com
After edited the same line of code but wrote two different things Git doesn’t know which code it should take and prints an error message.
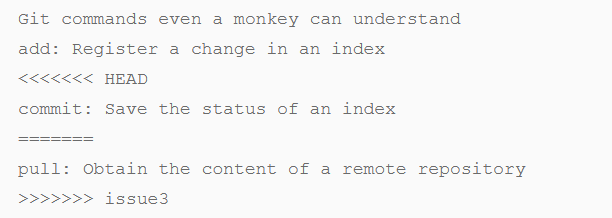
Merge conflict message printed out / Source: backlog.com
To solve the problem you need to go into the file delete the error message and choose one of the two codes. After the changes you can sumbit the file and push it to the remote version again.
Gitignore file
The .gitignore file can be used to don’t push (ignore) new files or ignore the changes of an already existing file. That helps a programmer to create code/commentary or whatever in a file which he doesn’t want to share with the rest of the people.
If you clone a repo over GitHub it automatically made otherwise you can just create a new file one in your project folder called “.gitignore”. Then it should appear in your folder like this:
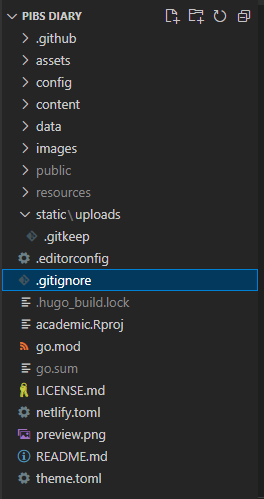
Snapshot of my diary project folder
To specify which files/folders should be ignored by Git you can use the following commands:
- **/xy (to ignore all files in the folder called xy)
- ** /xy/debug.log (to ignore the debug.log file in the xy folder)
- *.xy (to ignore all files in the .xy format)
More commands you can find on atlassian.com.