Nutanix Hands On
 Photo by Kent Pilcher on Unsplash
Nutanix Hands On
Foundation
First things first: What is Foundation? Foundation is a software published by Nutanix to autmate/make the process of staging a Node/Cluster easier. In a normal case a node needs a combination (https://portal.nutanix.com/page/documents/compatibility-interoperability-matrix/hardware) of a specific hypervisor (already explained what that is in Module 4) and an AOS (Nutanix’s OS for the CVM in a form of a VM) to join a cluster.
Therefore Foundation helps you with configuring a pre-imaged node, image a new node by yourselfe or discover them to join another cluster. For that there are different methods that can be used:
- Use the CVM Foundation and access it via http://CVM_IP:8000/
- Use case: For “discovered nodes” that are factory perpared and not part of any cluster yet and reachable within the same subnet
- Launch Portable Foundation as an .exe
- Use case: Most standard method to use and opens a GUI in the browser. Can also take a configuration file that automatically configures the GUI fields.
- Deploy Standalone Foundation as VM on VirtualBox or AHV etc.
- Use case: Not factory nodes that can’t be discovered and require and installing tool as well as an environment to run those tools
If you have an already running cluster tho you have to use the “Expand Cluster” feature in Prism. This allows you to re-image or image the nodes directly. If they are shipped outside the US the nodes have installed DiscoveryOS (which means they arent imaged but can be found by the discovery feature in Foundation or the Expand Cluster in Prism)
Configuration
So after everything staged properly and the cluster was formed with the three nodes I used, I can now configure it using Prism as a graphical user interface. Next steps:
- SSL Certificate
- Email configuration
- Network settings
- Set DNS
- Set FQDN
- Set NTP
- Configure virtual switch
- enable LACP (later)
- Create Subnet
- Change IP of IPMIs
- Check cluster health
- Create a storage pool and container
- Deploy a VM
Documentation
What shouldn’t be forgot is the documentation about the cluster. It contains a lot of different things and properly documenting subjects like hardware structure, cluster configuration, network configurations what services form Nutanix are used etc. Here is quick overview what it contains by default:
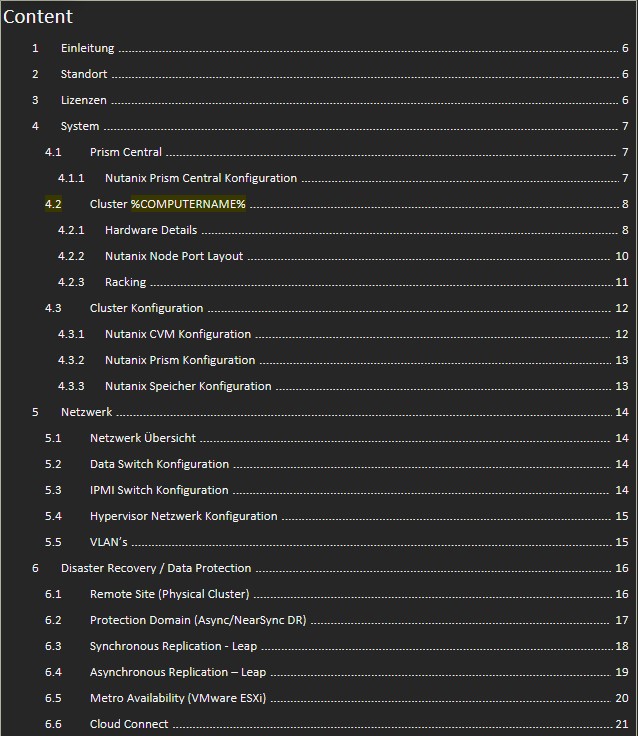
Table of Content Part 1
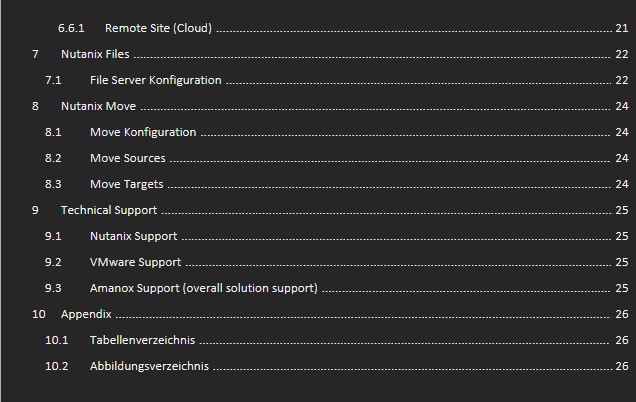
Table of Content Part 2
It is important to keep this updated and everything fill out properly as well as clean for various reasons:
- Know in a quick overview how everything was been configured
- If a problem comes up everything can be looked up
- One central point to gather all information about the cluster (hardware- as well as softwarewise)
- Can be exchanged between engineers and customer for a better communication
- Support and license cases can be easily processed
-> for that it is of extreme importance to keep it updated so everything remains consistent
LCM
The Life Cycle Manager or short LCM of Nutanix for the inventory and updating of firm- and software. For my cluster to be on the newest version I will use this framework to update. It will help me in a simple way to make everything from one single interface without searching everything seperatly and download all different soft- and firmwares from the internet manually.
As a first step you have to do an inventory with the LCM which basically gathers all the necessary updates that need to be done compared to your systems version. It also checks the LCM framework itselfe which you can also enable to automatically update. After making the inventory I was seeing the following updates that could be done:
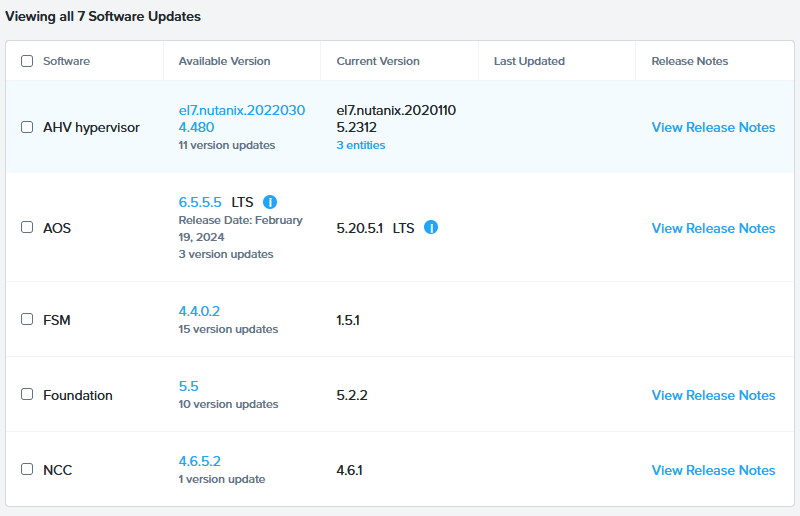
Updates available and found after inventory
Then before starting it first does a so called NCC (Nutanix Cluster Check) which basically checks the clusters for errors or faults which could prevent the cluster from smoothly updating. After doing it and all 832 checks passed I was then finally able to update the cluster. Everything runned perfectly and it completed every update at the first attempt.
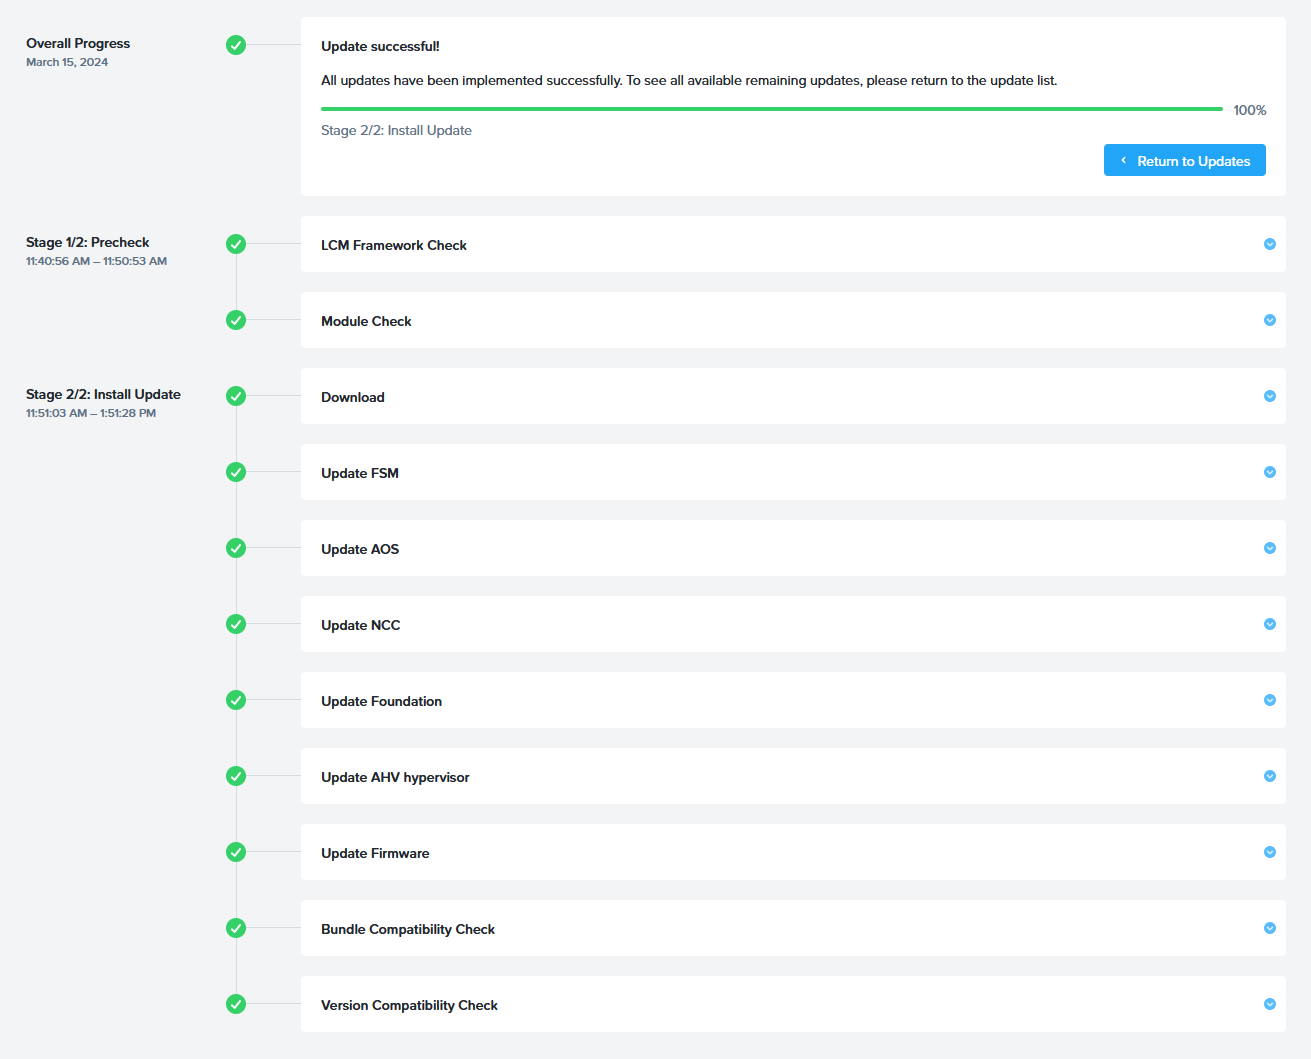
Successful update of all new soft- and firmware
Everything comes to an end
Now after staging, setting up and updating the cluster this module finds his end. Everything is done now. I now know most of the processes quite well due to the hands on practice and especially during the staging with the lot of trouble shooting it burned into my memory. But as of today the cluster health is good (all checks are good), the data resiliency is also okay and everything is set up as it has to be and the cluster was successfully integrated into the LAB.