Getting started with your Trainee Diary
 Image credit: Unsplash
Overview
Welcome to the team we wish you a great start and time at our company ❤️. In this post we will guide you through the setup of your trainee diary. If you have any questions or you are stuck at something just get in touch with one of our coaches. We are looking forward to work with you and no worry if you don’t really understand everything which will be going on in this tutorial. If you want to copy or use something either from Jexinators or Gitgotchis blog post feel free to do it though attribution is appreciated.
Table of Contents
Requirements
Befor you start make sure you fullfill all the requirements to start this guide otherwise it can cause problems.
👉 Download a Packet Manager For Windows |for Mac (shown in the next chapter)
👉 Have something where you can store your passwords. For personal accounts you can use either Bitwarden or Proton Pass (if you already have an account). For your company accounts you should already have access to your Keeper account.
👉 Have some portrait of you ready (voluntary)
👉 Create a Github account
👉 Link your Github account with a Netlify account (show in the third chapter)
👉 Create a Gravatar/Wordpress account (voluntary)
👉 Create a LinkedIn account (voluntary)
👉 Have an editor or IDE installed an be familiar with it (We would recommend Visual Studio Code) to start with.
So now that you have everything: let’s start.
Installation of Chocolatey
This part is only interesting for windows users.
Go to your search and tipp in Windows Powershell and then open it as an Administrator (you need to request privileged access with Heimdal -> for this ask either one of your coaches or one of your collegues).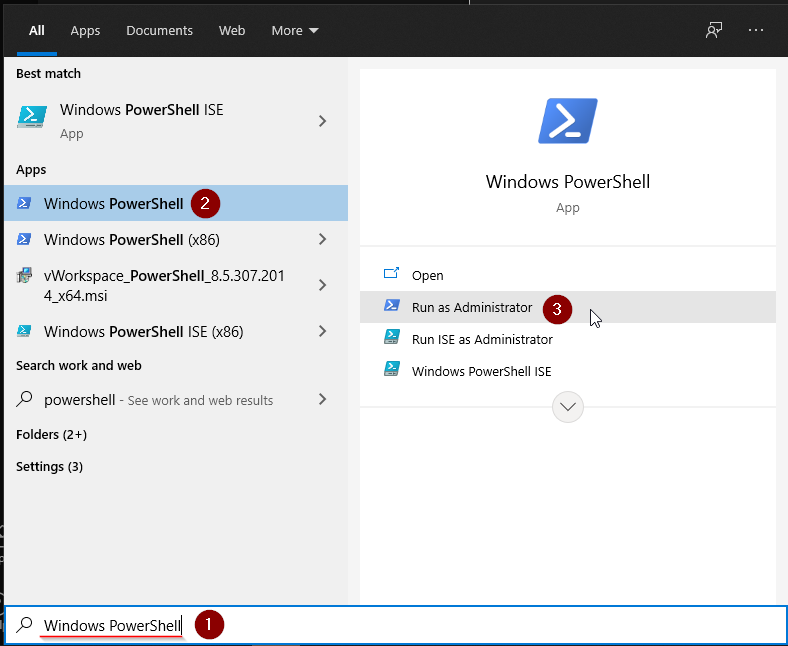
Then copy paste the following command into powershell.
Set-ExecutionPolicy Bypass -Scope Process -Force; [System.Net.ServicePointManager]::SecurityProtocol = [System.Net.ServicePointManager]::SecurityProtocol -bor 3072; iex ((New-Object System.Net.WebClient).DownloadString('https://community.chocolatey.org/install.ps1'))
Use this to check if everything went fine.
choco

Connect your Github with Netlify
First of all you need to fork the Repo from wowchemy.
After clicking on the link, you’ll be greeted with the welcome screen.
Click the big ‘Connect To Github’ button on the welcome screen (or alternatively click the link underneath to connect with Gitlab):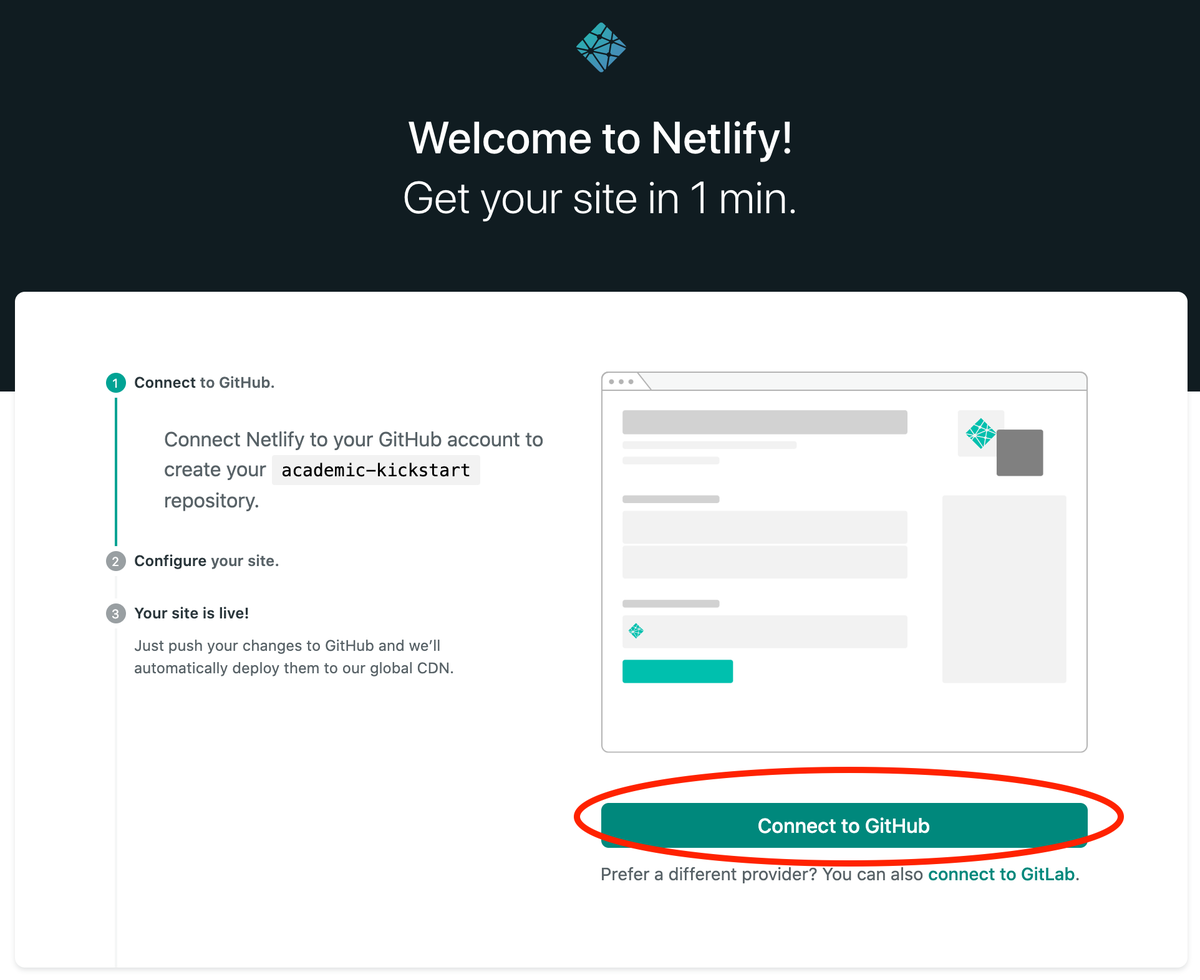
Login with your Github account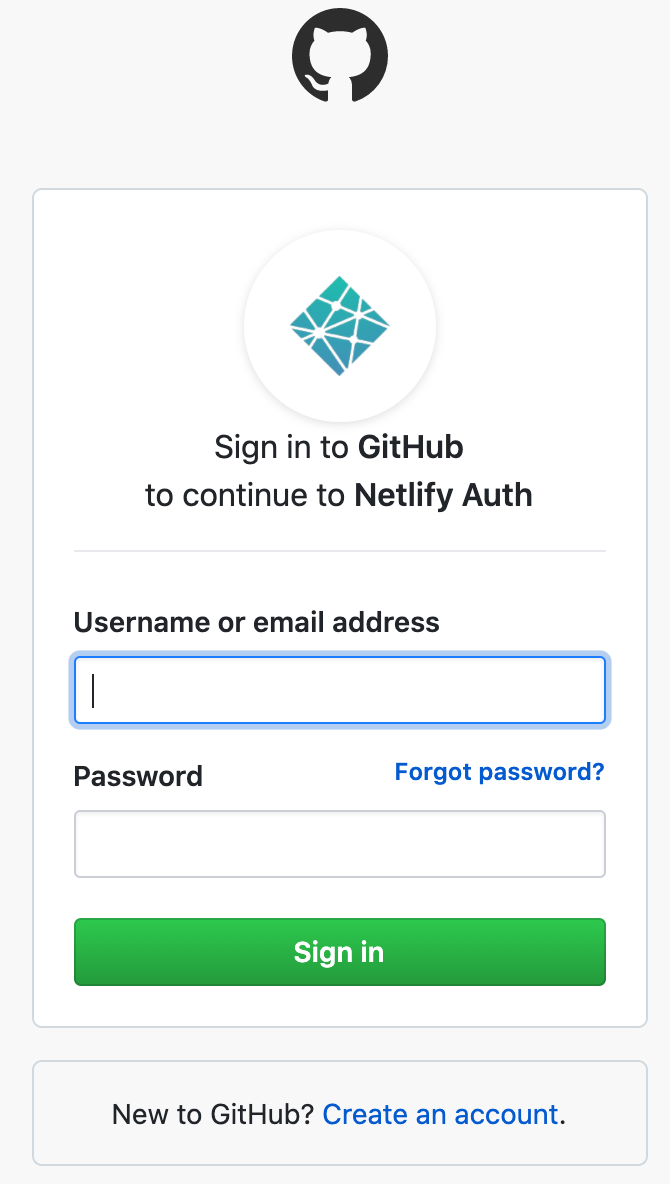
Choose a name that represents what your site should be called like. Click ‘Save & Deploy’ to create a repository for your site on Github: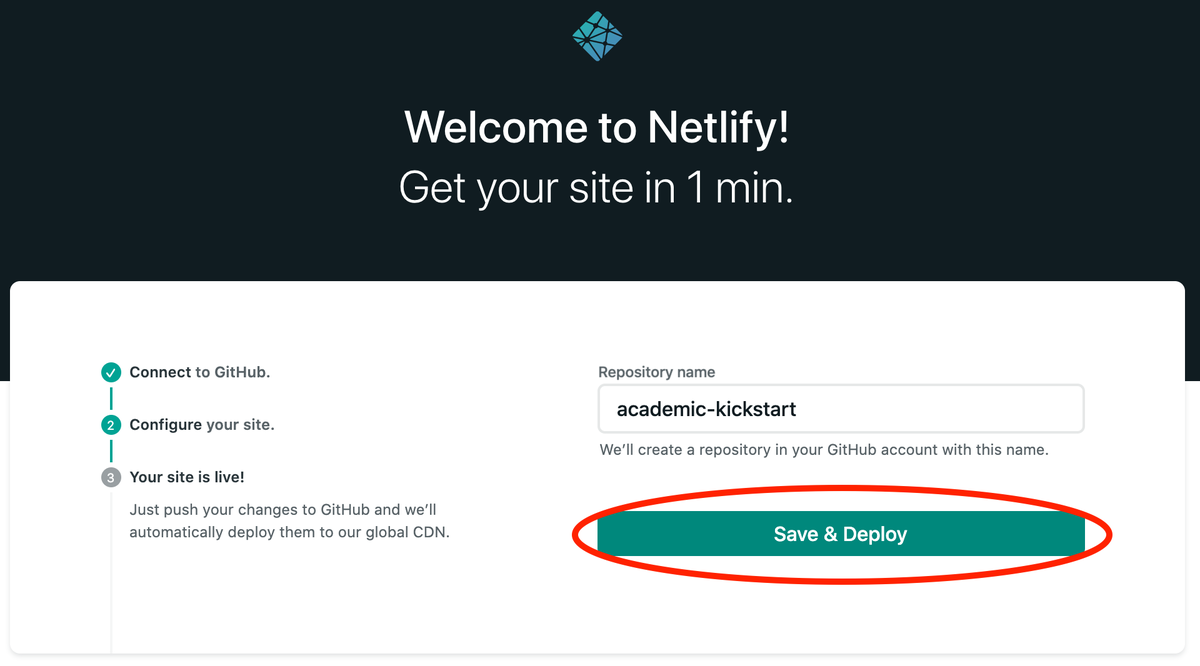
Netlify will now generate your new site. Generally this takes around 1 to 5 minutes, but can take longer during busy periods. You’ll see the green “Published” notice appear under Production Deploys once it has completed.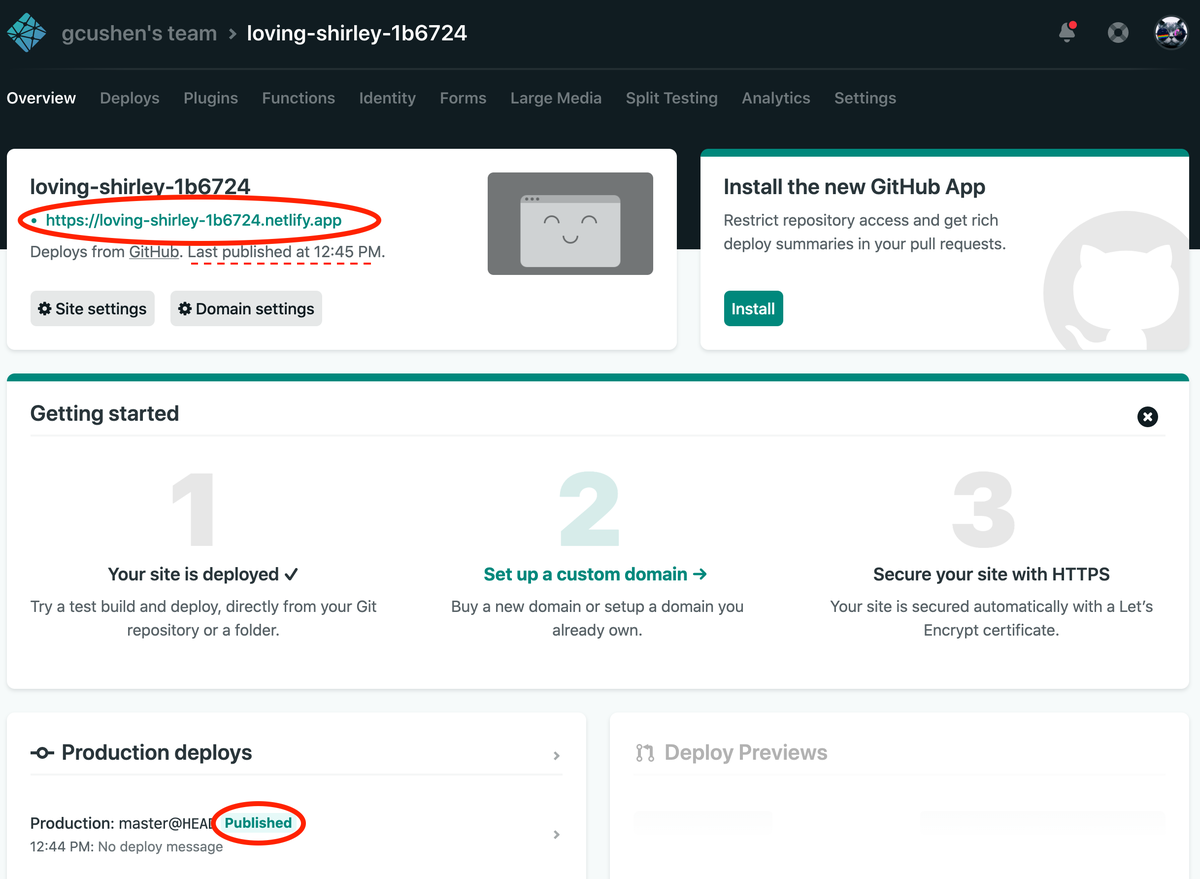
You’ll notice that Netlify assigns a free, random URL to the site. Let’s customize the URL to something more relevant. First click Site Settings:
Click Change site name…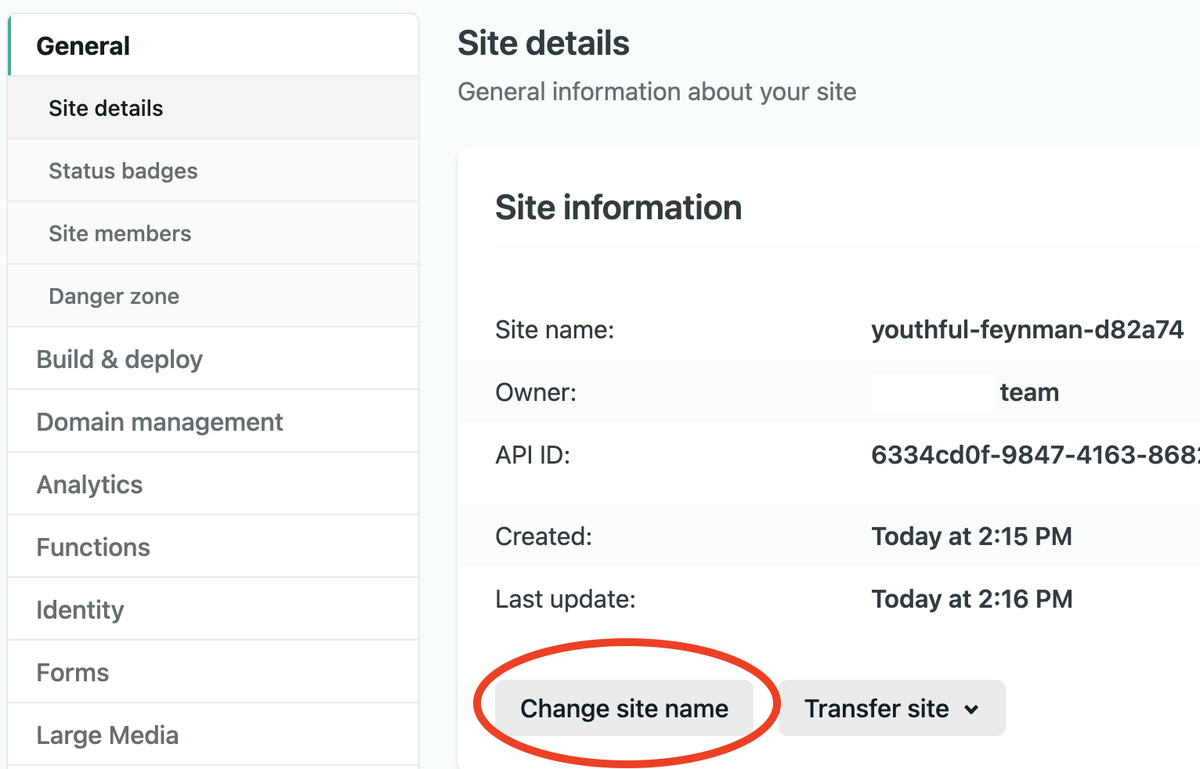
Enter your site’s name (for example what your blog should be called like), separating words with a hyphen (-) rather than a space.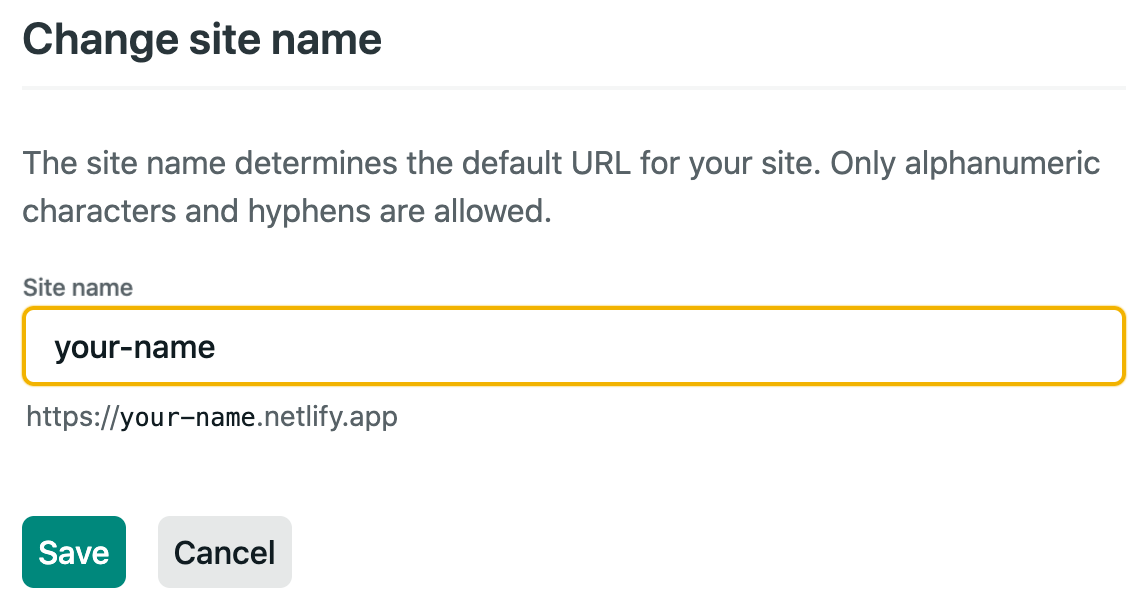
Awesome! We can now visit the site at the URL you chose!
Check your (GitHub) email to accept the invite to edit your site in the admin panel: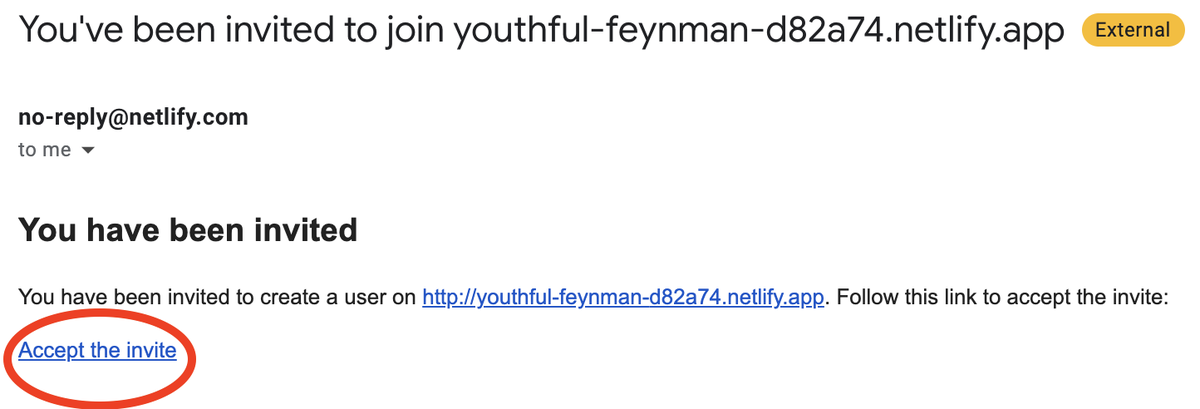
If you can’t find the email:
- Go to Settings > Identity, and select Enable Identity service
- Under Registration preferences, select Invite Only
- Scroll down to Services > Git Gateway, and click Enable Git Gateway
- This allows editors to write content without needing a GitHub account
- Head to the Identity tab at the top of the Netlify dashboard and then click the Invite Users button to invite yourself by entering your email address
You will then be prompted to create a password: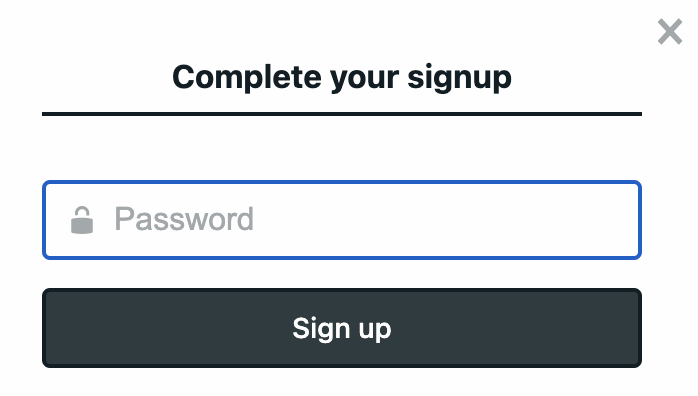
Now you’re ready to edit your site in the CMS: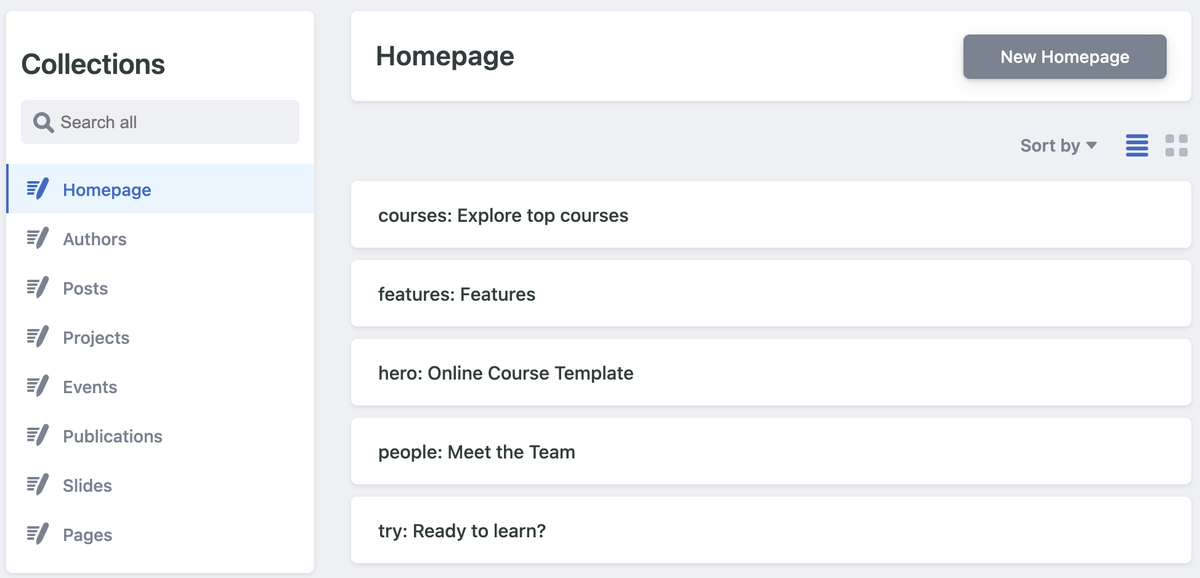
Clone the Repository on your machine
Now let’s get our hands dirty with git. Git is version control system and there are many Solutions out on the market to name a few Github, Gitlab, CodeCommit, etc. Initially it was created by Linus Torvald (Father of Linux kernel) to help him and other people to collaborate on the development of the kernel code. The base software is open source. Git is widley used in the open source community anyhow it is a basical skill which you will likely face at one point if you work in IT. So if you hear commit, branch, fork or repository it is always related to git.
Log into your Github account and check if there was a new repository created.
You should see something like “githubAccountName/githubOrganizationName/repositoryname”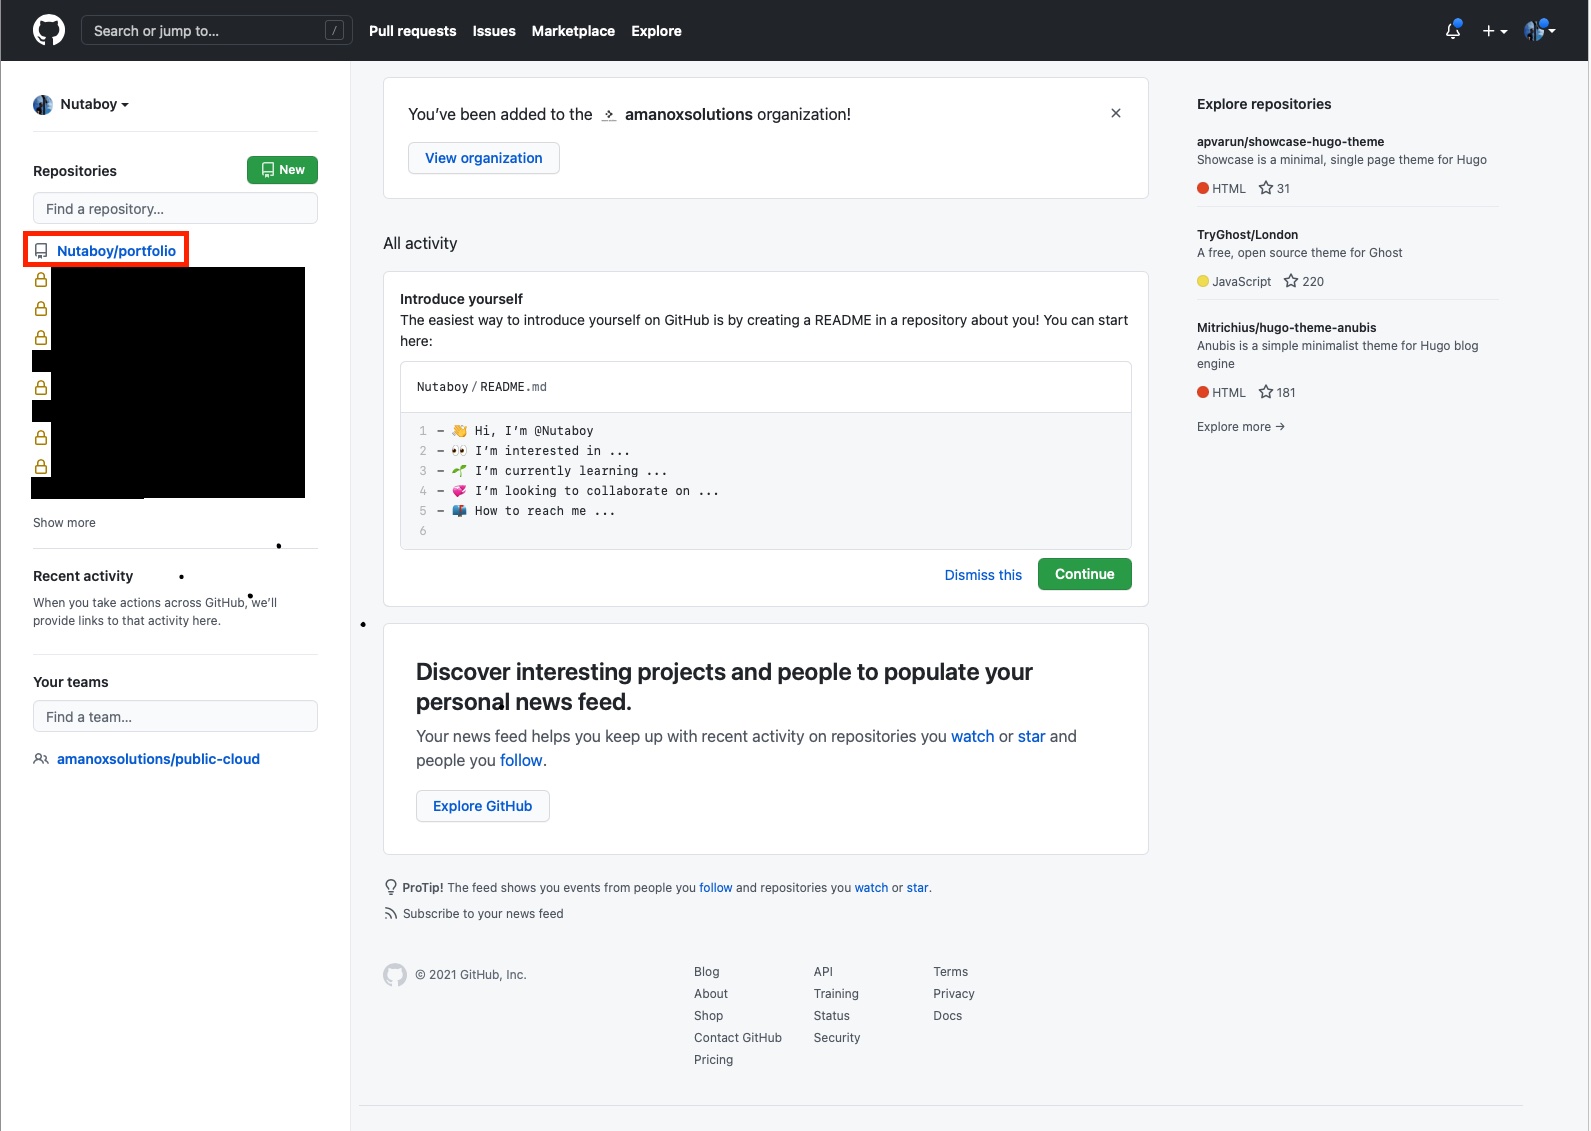
Next you should open an command line tool on your pc.
On mac open the terminal and type in the following command:
homebrew install git golang hugo-extended nodejs
If you use an mac with the new M1 you need to install ‘go’ this way.
arch -arm64 brew install go
choco install git go hugo nodejs -confirm
After those steps all required tools should now be installed. But you can also install the Github Desktop Version (only if you want a GUI but it’s not necessary).
We recommend you to master the command line. It is more convinient and indepentent. The next step will be to create a folder on your PC where you store your repositories.
In your Github account navigate now into the newly created repository and copy the ‘clone link’ of the repository. We will need it to create a local copy of the repository on your machine.
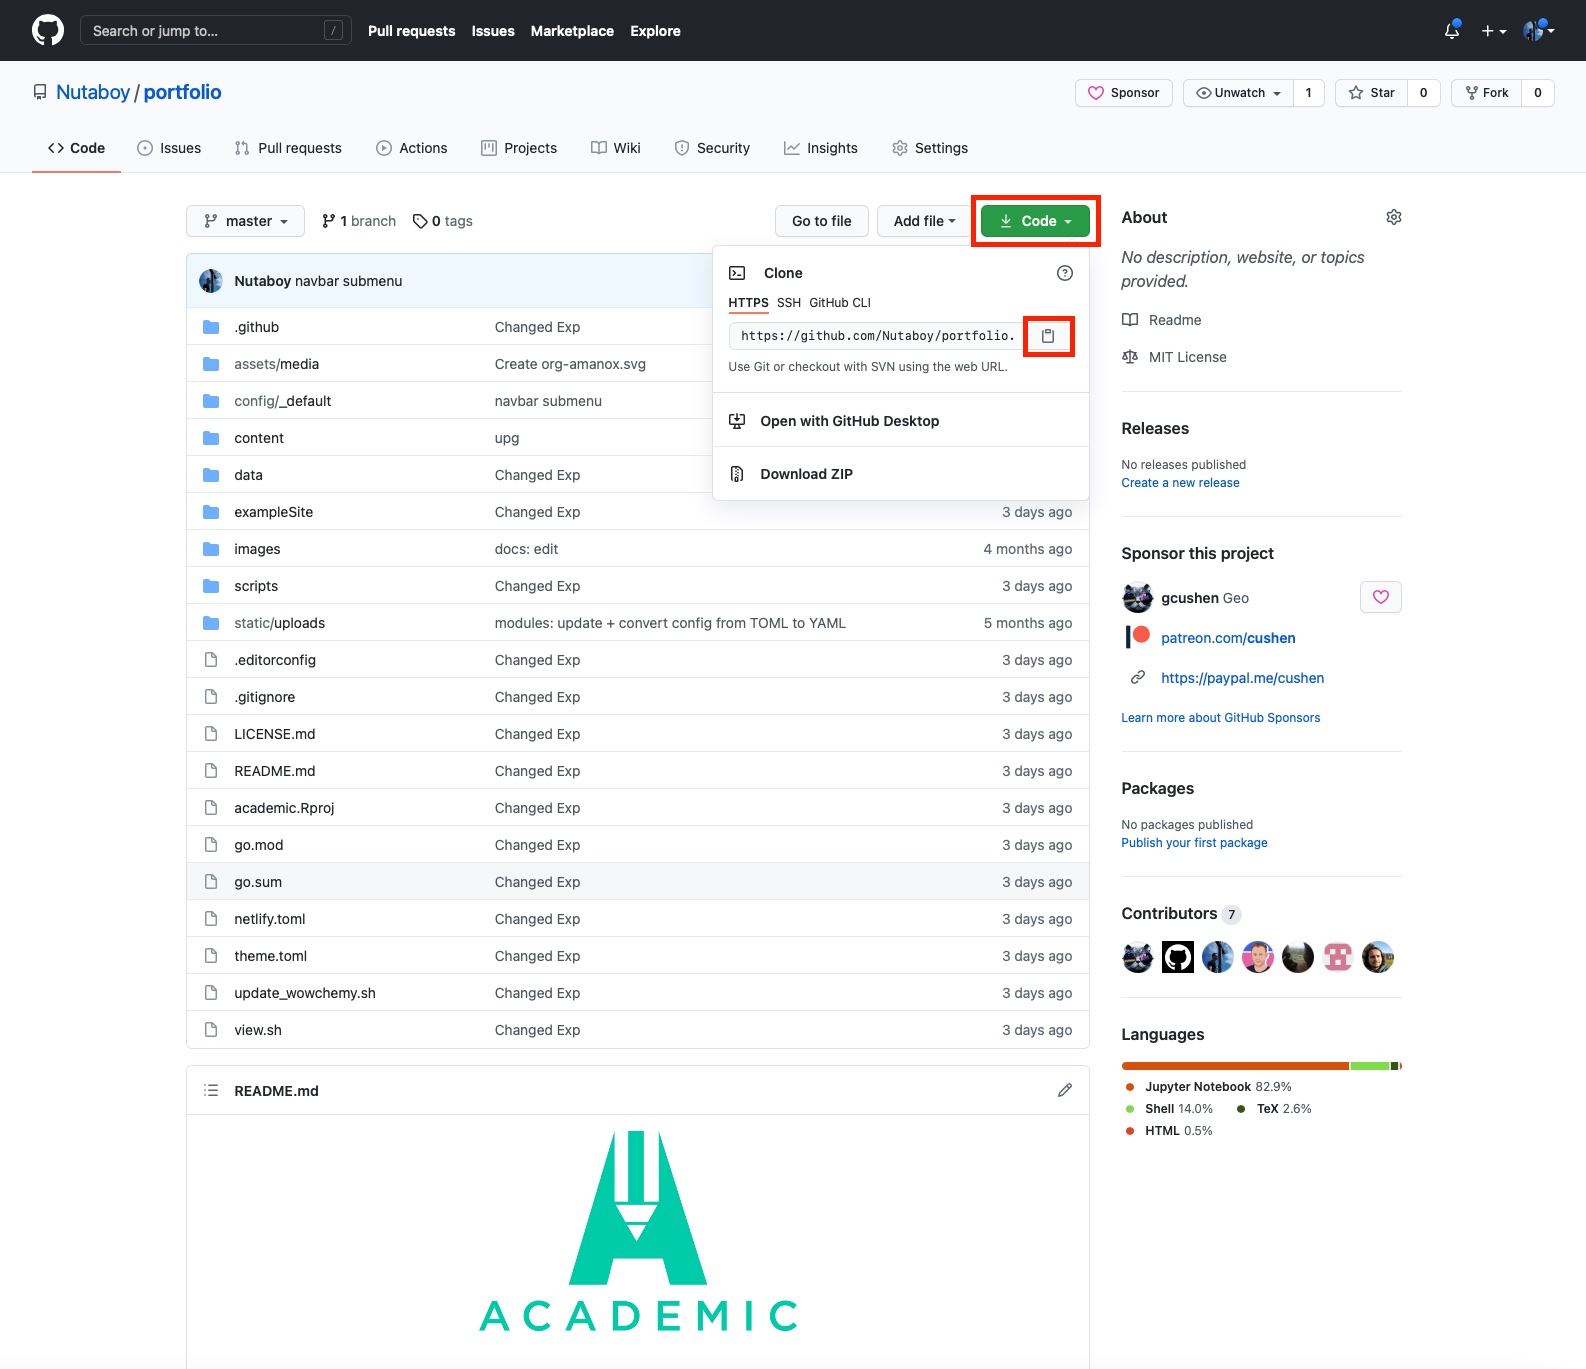
Now you go back to your already open console. The following commands are creating a simple folder structur in your user directory.
for mac:
cd ~
mkdir repos
cd repos
mkdir blog
cd blog
git clone https://github.com/username/repo-name.git
for windows:
cd C:\Users\YourName\
mkdir repos
cd repos
mkdir blog
cd blog
git clone https://github.com/username/repo-name.git
You can also choose a different structure if it fits your need better. The above is just a proposal.
Congrats you finished this part. 🙌
Setup your blog page
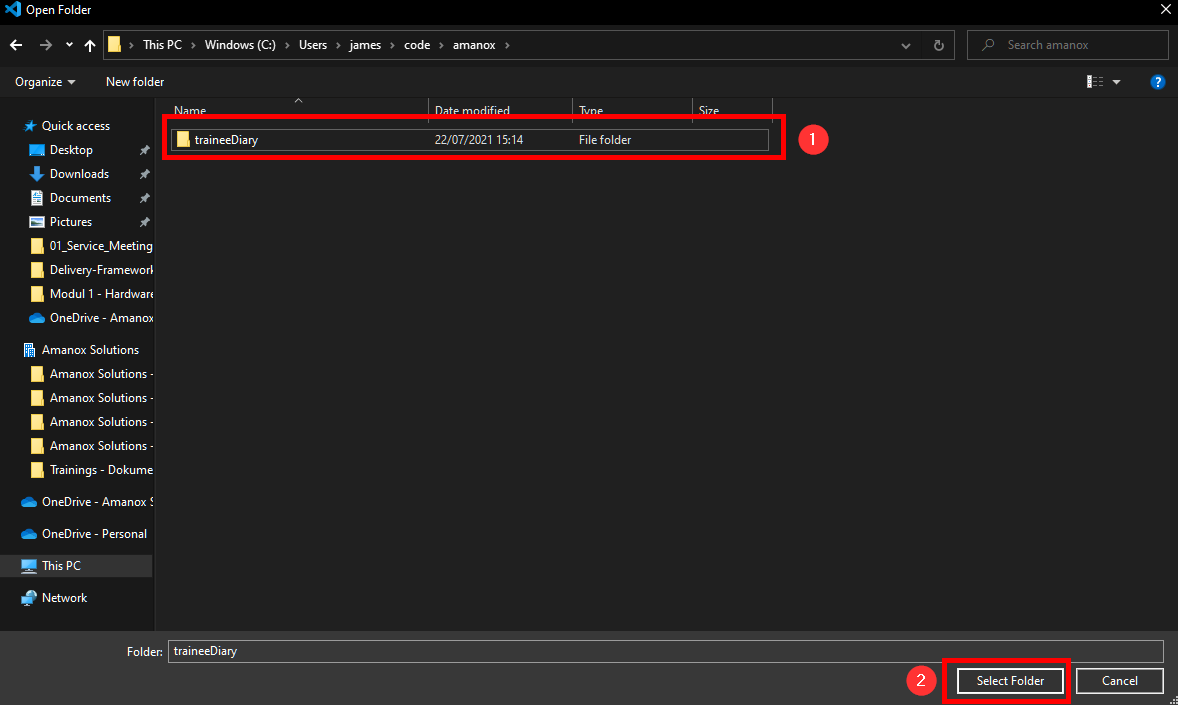
Open now Visual Code (or whatever IDE you use) and click on “open Folder”.
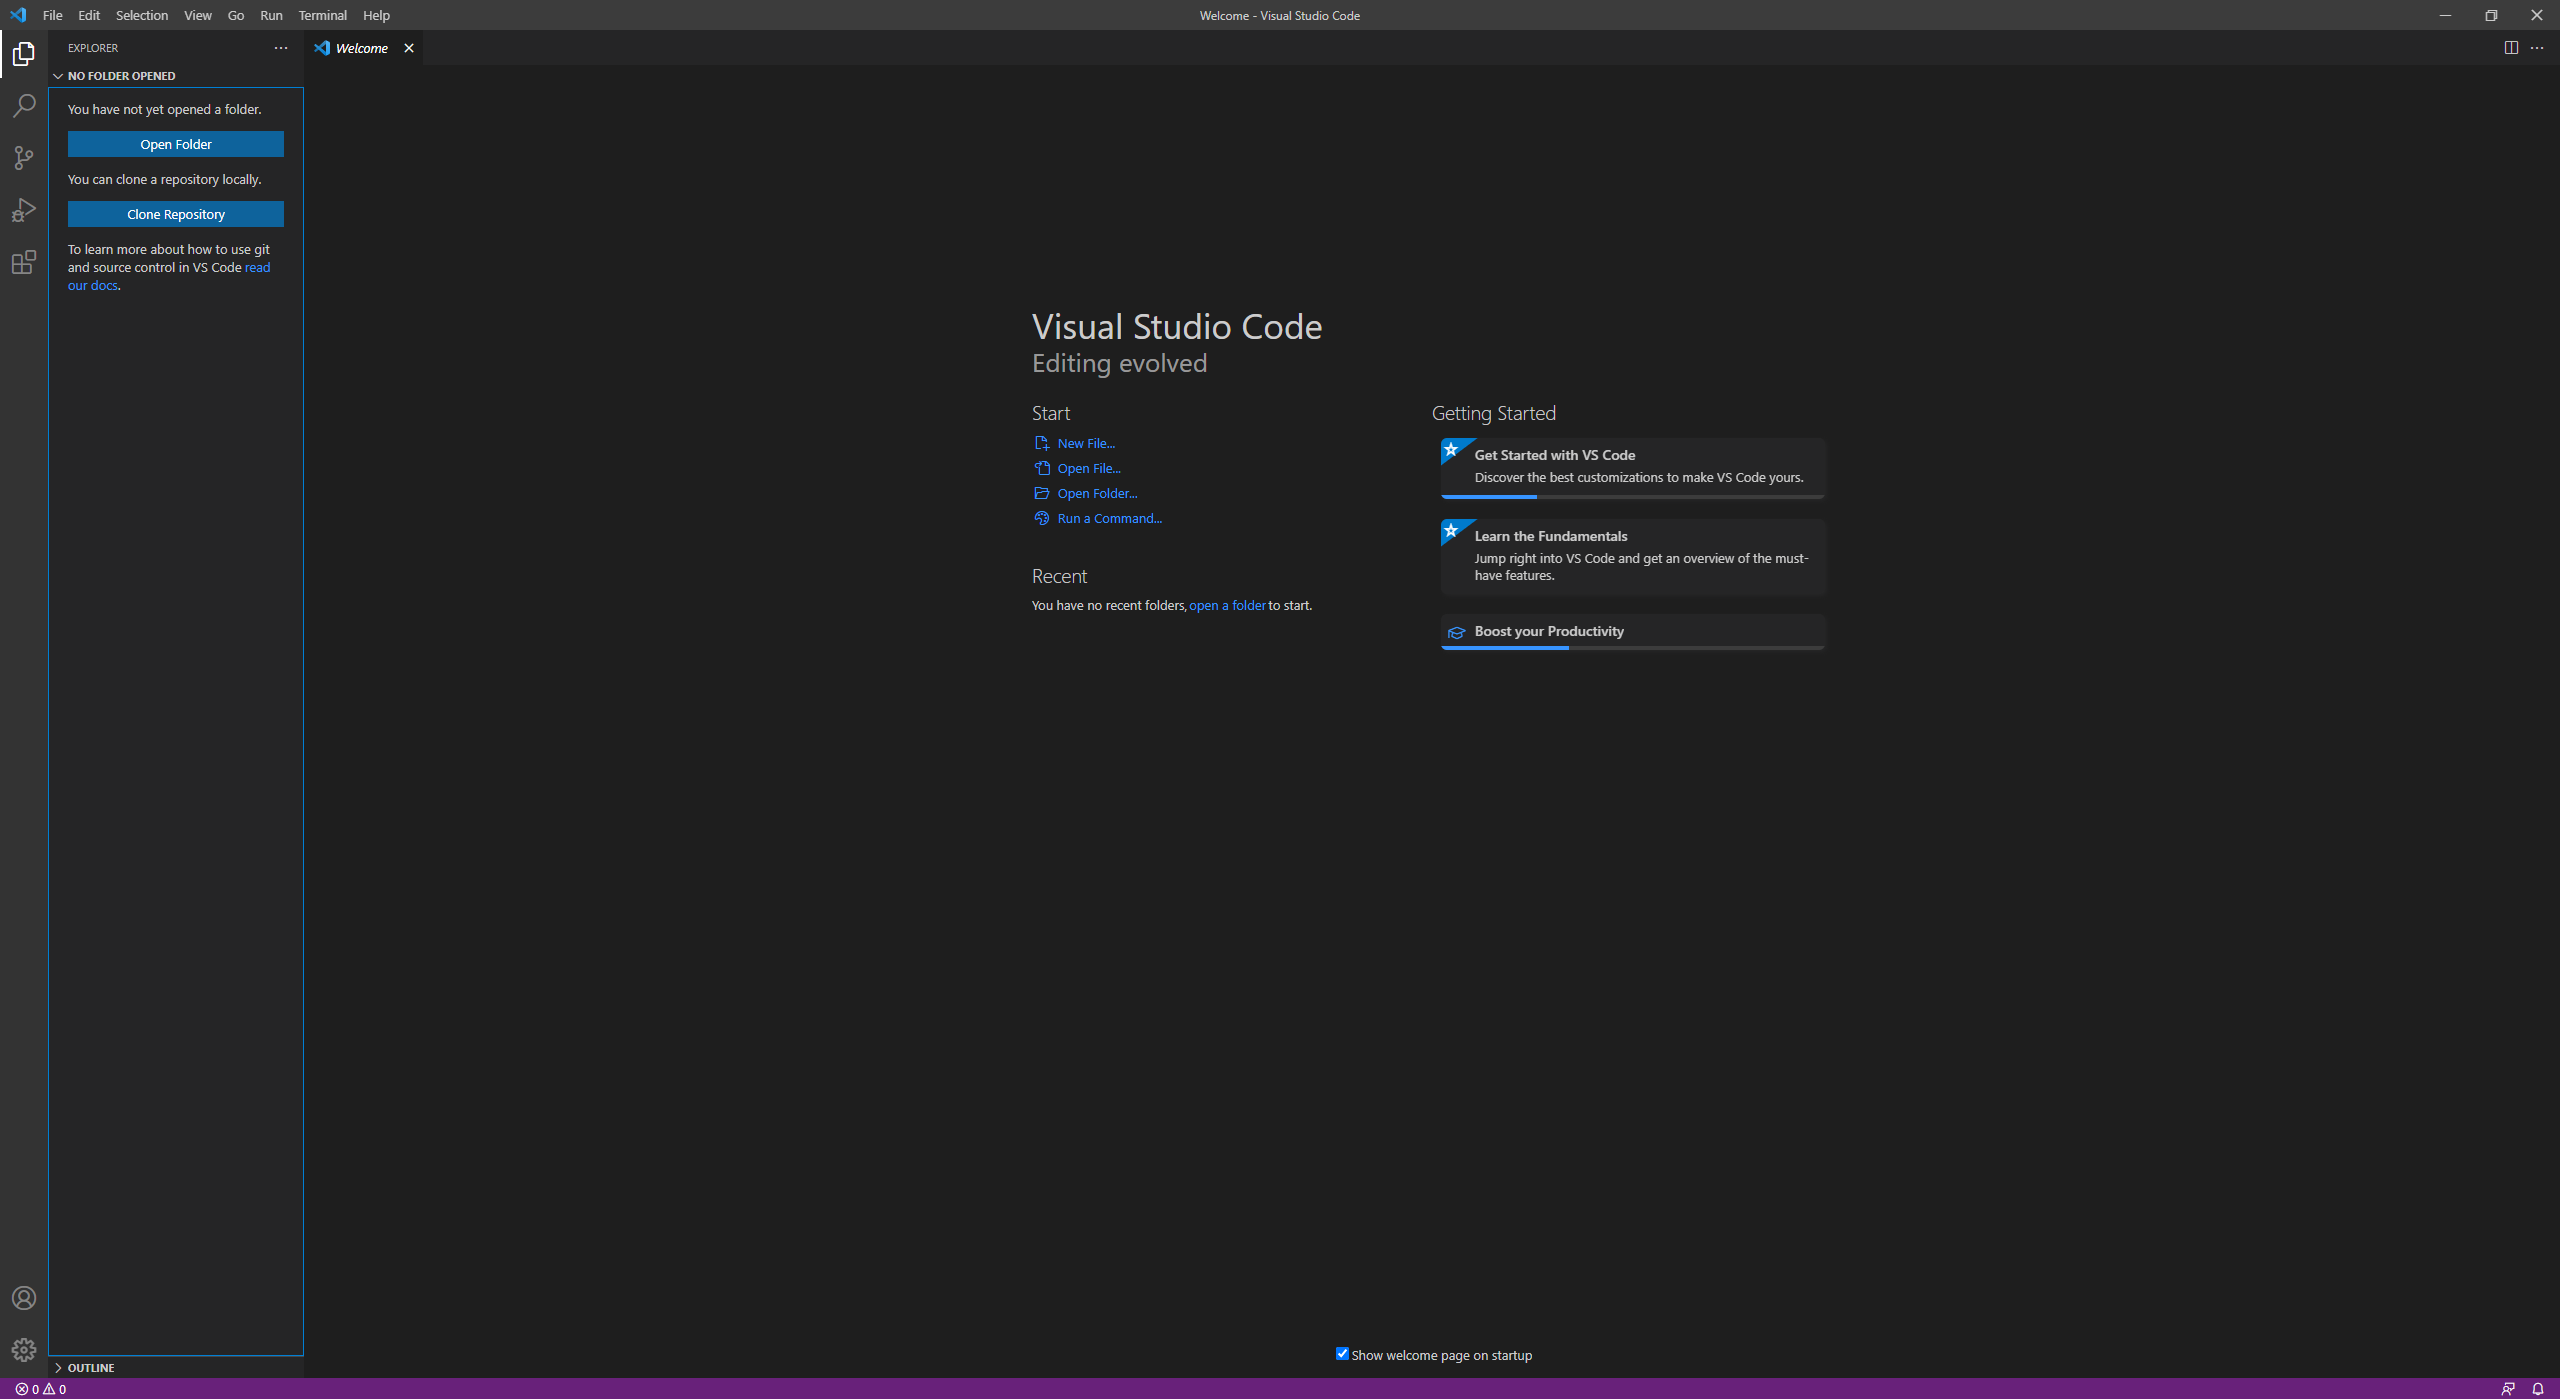
Next you navigate to your repository and open it.
The you should see a screen like this:
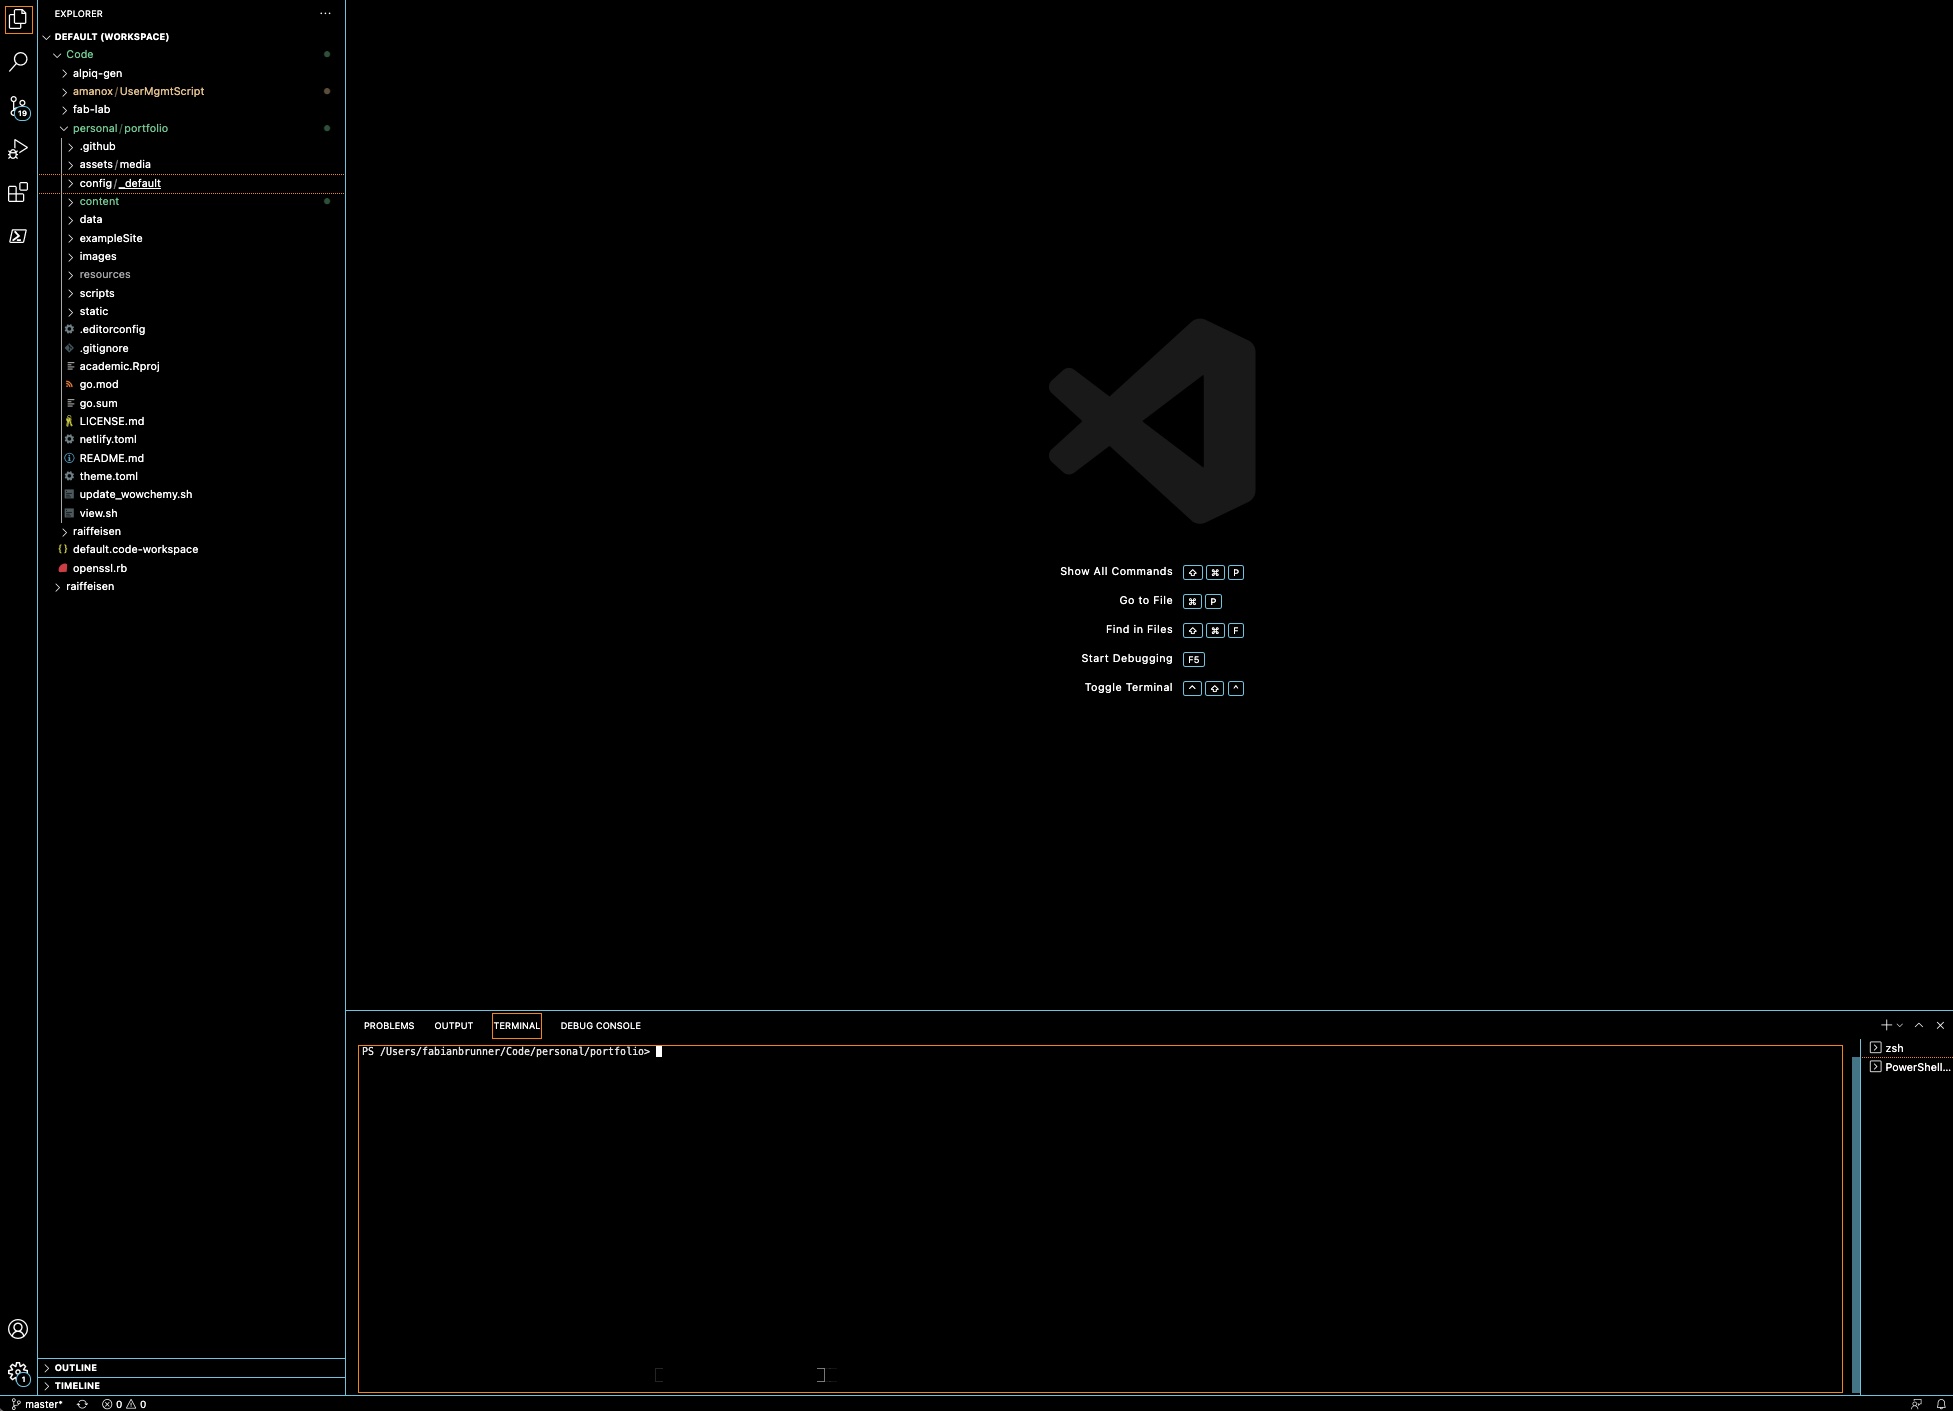
Now we are ready to edit your trainee diary.
Start editing
For this you can follow the Hugo Blox Docs of the following two sections:
Read through them carefully and try to adapt the code parts like you want them to be and present your personal style. If you have any questions don’t hesitate to ask us. If you need any further informations about how to represent the text parts correctly or formatting it reference this part of the documentation (Markdown formatting).
The following parts you can start editing and personalize:
- config/menus.yaml
- config/params.yaml
- content/authors/admin/index.md
- content/authors/admin/avatar.jpg
- content/index.md
- content/expirience.md
- content/projects.md
The following predefined templates you can deactive for now and as soon as you got something to post you can adapt them later on (but you can change the basic settings of them with editing their index.md):
- content/teaching
- content/post
- content/project
- content/event
- .github/ you can delete (we don’t need that for now)
Of course you don’t have to change everything but you can. You are completely free what you want to change, in which way and how much. Keep in mind that this blog should represent you as a person and you will publish your learnings, weekly posts and some other things on it. You also don’t have to change everything now. This blog will be a longterm project where you can adapt a lot of things over time.
View your page and changes
For now you can make your changes just locally. For that you have to run the following commands:
for mac:
vim ~/.bashrc #or maybe ~/.zshrc

# add the following line to the end of the file. for that press 'i' and go to the end with the arrow keys
export PATH=$PATH:/usr/local/go/bin
# now safe it with pressing ':wq' and restart your terminal

cd ~/repos/blog/repo-name

hugo server -D
for windows:
cd C:\Users\YourName\repos\blog\repo-name

hugo server -D
Now you can open your browser and type ‘localhost:1313’ and then it should show how your site looks like. With every change you make there will be an immediate feeback visible on your page.
You can always reference the two other blogs jexinator.ch or gitgotchi.ch if you need inspiration or want to look how others have done it. Also you can reference our repositories (ask get access them because they arent public) or the documentation of Hugo Blox.
As soon as you think your blog is finished and looks the way you like it, you can progress to the next chapter.
You are awesome and finished the second part.🙌
Add your first post
You can now change one of the example post folder names with clicking on the folder and press F2. Call it for example My blog creation. Then exchange the featured.jpg with a picture you like and edit the index.md in that folder.
Your first task:
Describe how the setup of your blog worked so far. What were difficulties, what did you already know and what new things you learned. Maybe also explain some of your features that you implemented and how you did it.
Your second task:
Do the same for a publication. Edit an already existing publication for the topic ‘Technologies I used for my blog page’. Gather some informations about:
- What is Git and what is it used for? What’s the difference to GitHub?
- Explain what a .md, .html or a .css file is, in which scenario they are specifically used and the basic structure they are using
- Why did we use ‘chocolatey’ or ‘homebrew’ to install certain applications? What would be an comparable tool for a Linux system?
- Add images where needed to maybe explain concepts or some code
and describe them in your publication. You don’t have to understand everything completely in all details but get a rough understanding of those topics because you will see them a lot later on in your journey. The depth of research for each topic can be choosen freely based on how interesting it is for you.
Sources you can use for your research (you don’t have to read everything. Instead learn how to pick out things of documentations and articles that are necessary for your current project or task to be efficient):
- Documentation of Github
- Looking for cool free-to-use Pictures
- Tutorial and reference for html, css and js
- Chocolatey Documentation
- Homebrew Documentation
Great you also finished the third part of this tutorial.
Go live
Befor you now can see some effect of your work on your live blog page you need to save your files and then make a local git commit and push it to the github repository.
First of all do this:
# create a .gitignore file (if it doesn't already exist) and add the following lines to it

# IDEs
.idea/

# Hugo
/resources/
public/
jsconfig.json
node_modules/
.hugo_build.lock
config.toml
Then continue to add your files and commit them either over the GUI of your IDE or the command line:
git add filename
git commit -m "Your commit message"
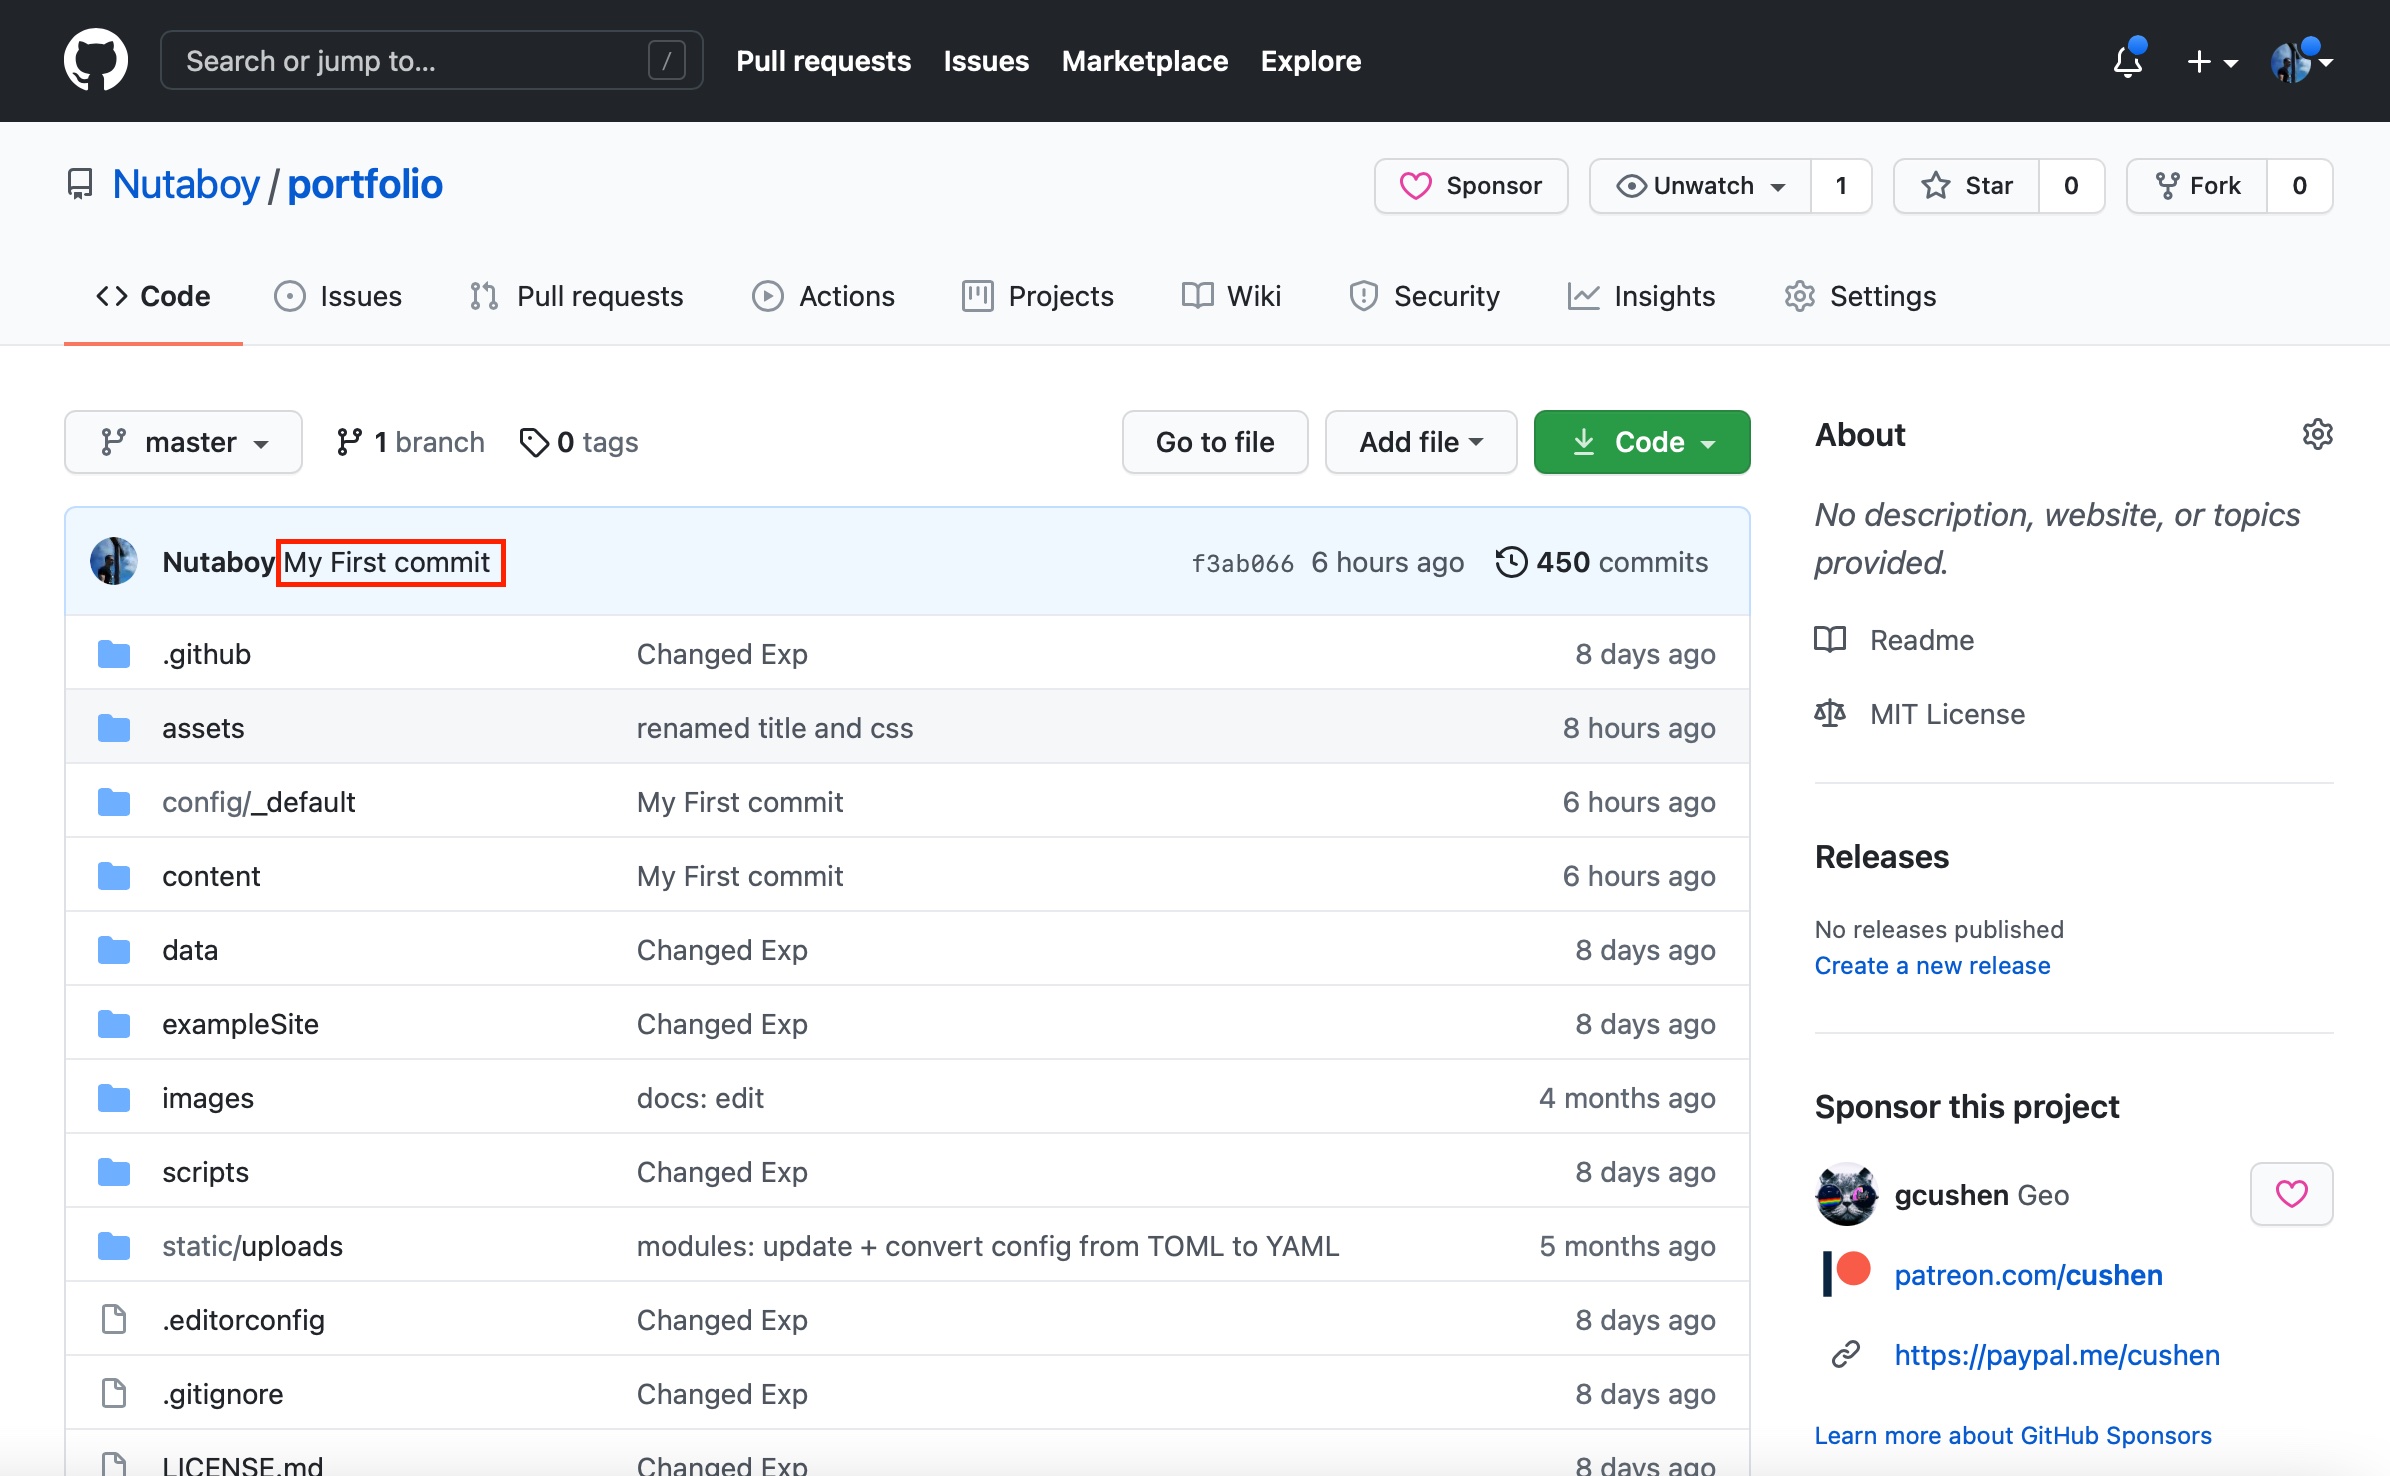
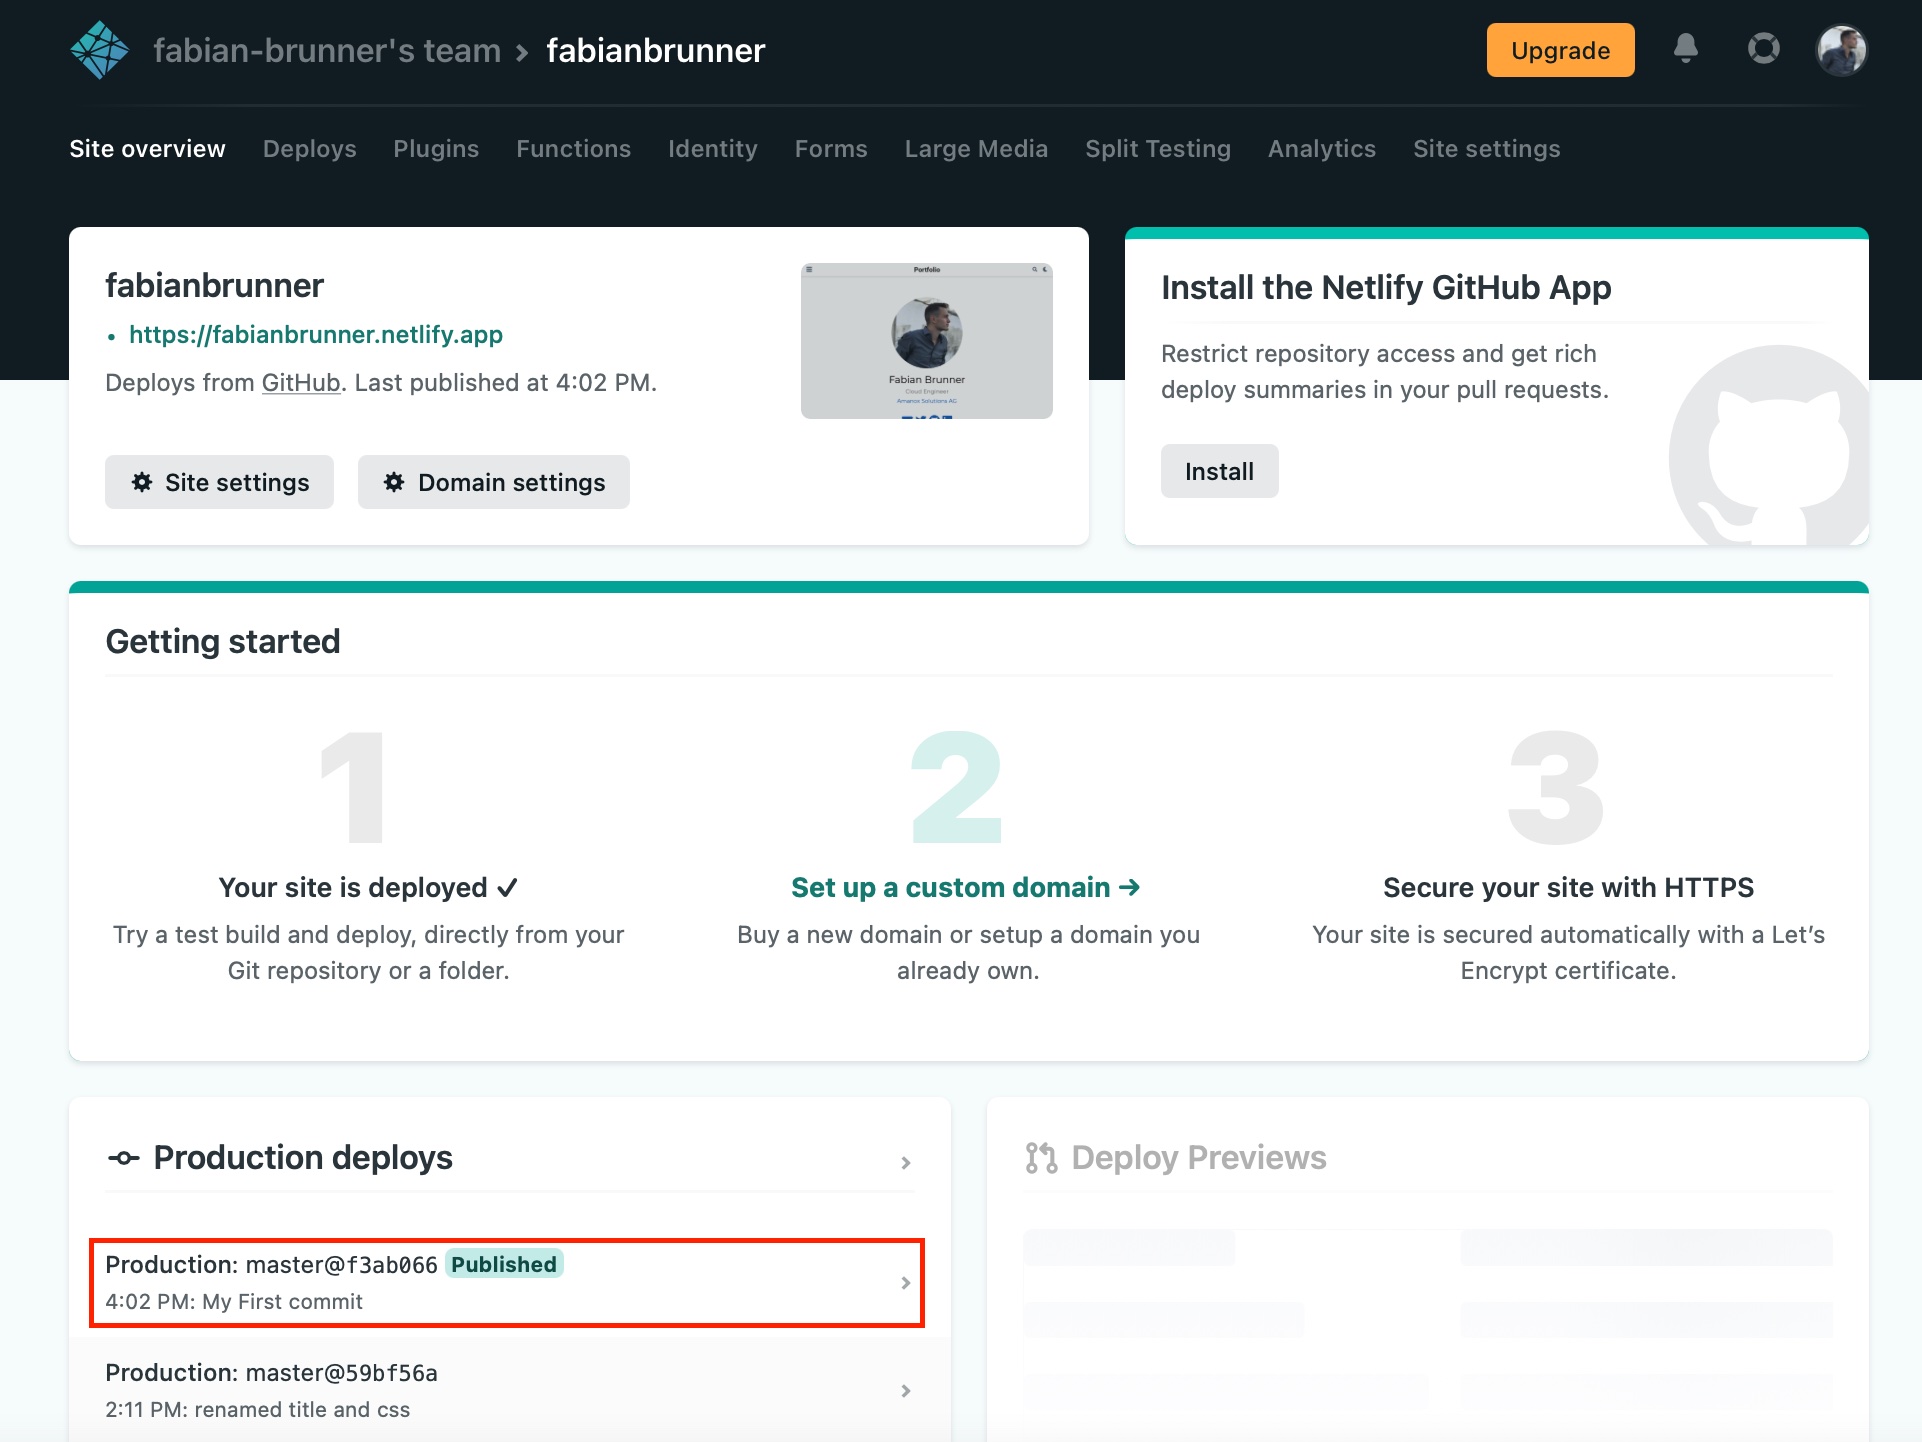
As soon as you added are files you can push it with ‘git push’ or over the GUI. After you pushed your changes to the Github repository lets login into our Github account and check if everything worked out as planned.
In the red box you see the description of the last commit.
After that we can go to Netlify to check if our changes were actually published to the world wide web. If you didn’t broke the syntax everything should be fine. If you got an error check if there is no typo in your files. Keep in mind: when you push a new change you need to wait for 1-2 minutes until it is live.
If you now access your page and scroll throw it you will see the content should have been updated.
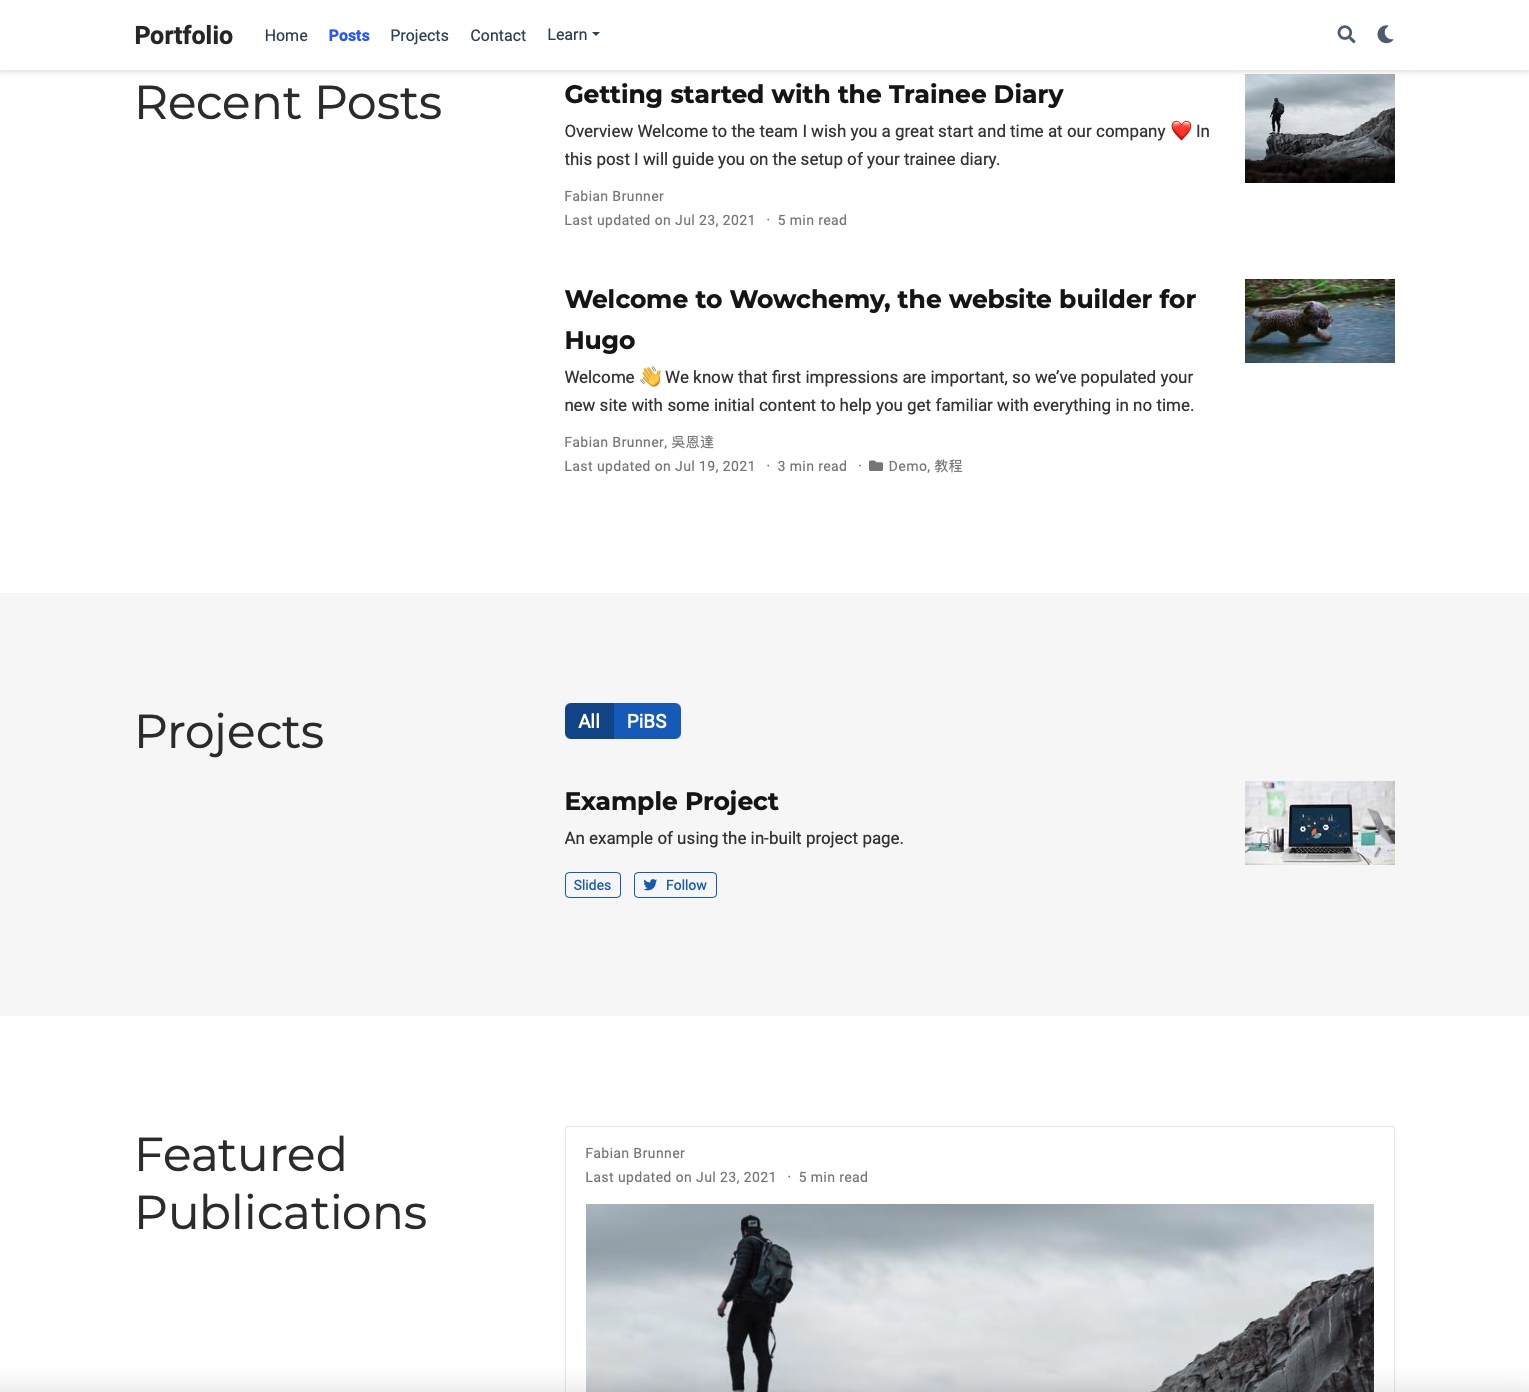
Awesome! Congratulations for finishing your first module 😉. You were able to set up your own blog page. Now everytime you want to publish something for a module or something else just add a new section to one of the folders and push it. For all other references and informations reference the ‘PiBS journey’ page.
Weekly posts
At the end of each week you have to write a post about what you learned and what happen during your current week. Reference the ‘Weekly diary guide’ page for further informations on how to structure that post and what to include.
Feedback
Please give us feedback on how the module was for you, what we could change as well as positive or negative aspects.